Building a Twitter Bot Using Python, Docker & Amazon Web Services
My favorite video game over the past two years has undoubtedly been Apex Legends; a free-to-play cross platform battle royale-style fighting game, where teams of three compete to be the last team standing before the ring closes and eliminates all players. While a simple concept, the game tests players ability to communicate, work as a team, and think outside the box; all things which I just can’t get enough of. I love the game so much that I wanted to give back to the community. To have the best chance of being the last team standing and winning the round, throughout the game, players pick up different weapons, shields, and attachments, as players begin the round with nothing. These items have different rarities and can be combined in various ways that increase both your character’s ability to do damage to enemies and increase character’s health. Items in the game typically have the following attributes; Common (White/Level 1), Rare (Blue/Level 2), Purple (Epic/Level 3), Heirloom (Red - Applies Only Upgrading to Shields), and Legendary (Gold/Level 4). Players can obtain these items by finding them on the ground (aka ground loot), finding them in loot crates scattered throughout the map, or by using crafting materials to purchase items from the Replicator.
“Imagine having to go to a restaurant to view the menu and not being able to view the menu online. How would would you decide if you even wanted to go to the restaurant...that’s what the Replicator is like.”
The Replicator - Players can collect crafting materials across the map in each round that can be used to purchase loot (items) from the Replicator. Once a player has enough crafting materials, that player can go to a Replicator and purchase whichever items are listed in the Replicator menu. Items in the Replicator are constantly being rotated. Some items are switched out daily, some weekly, and some are permanently in the Replicator for the season. Switching items in-and-out of the Replicator allows for game play to be fun and fresh each day. However, not all loot in the Replicator is worthwhile to purchase or exciting to use. Until this point, the only way to know what items are in the Replicator is to play the game and access the Replicator to check. Imagine having to go to a restaurant to view the menu and not being able to view the menu online. How would would you decide if you even wanted to go to the restaurant...that's what the Replicator is like.
This blog post describes my solution for allowing players to view what is in the Replicator for the current day without having to play the game.
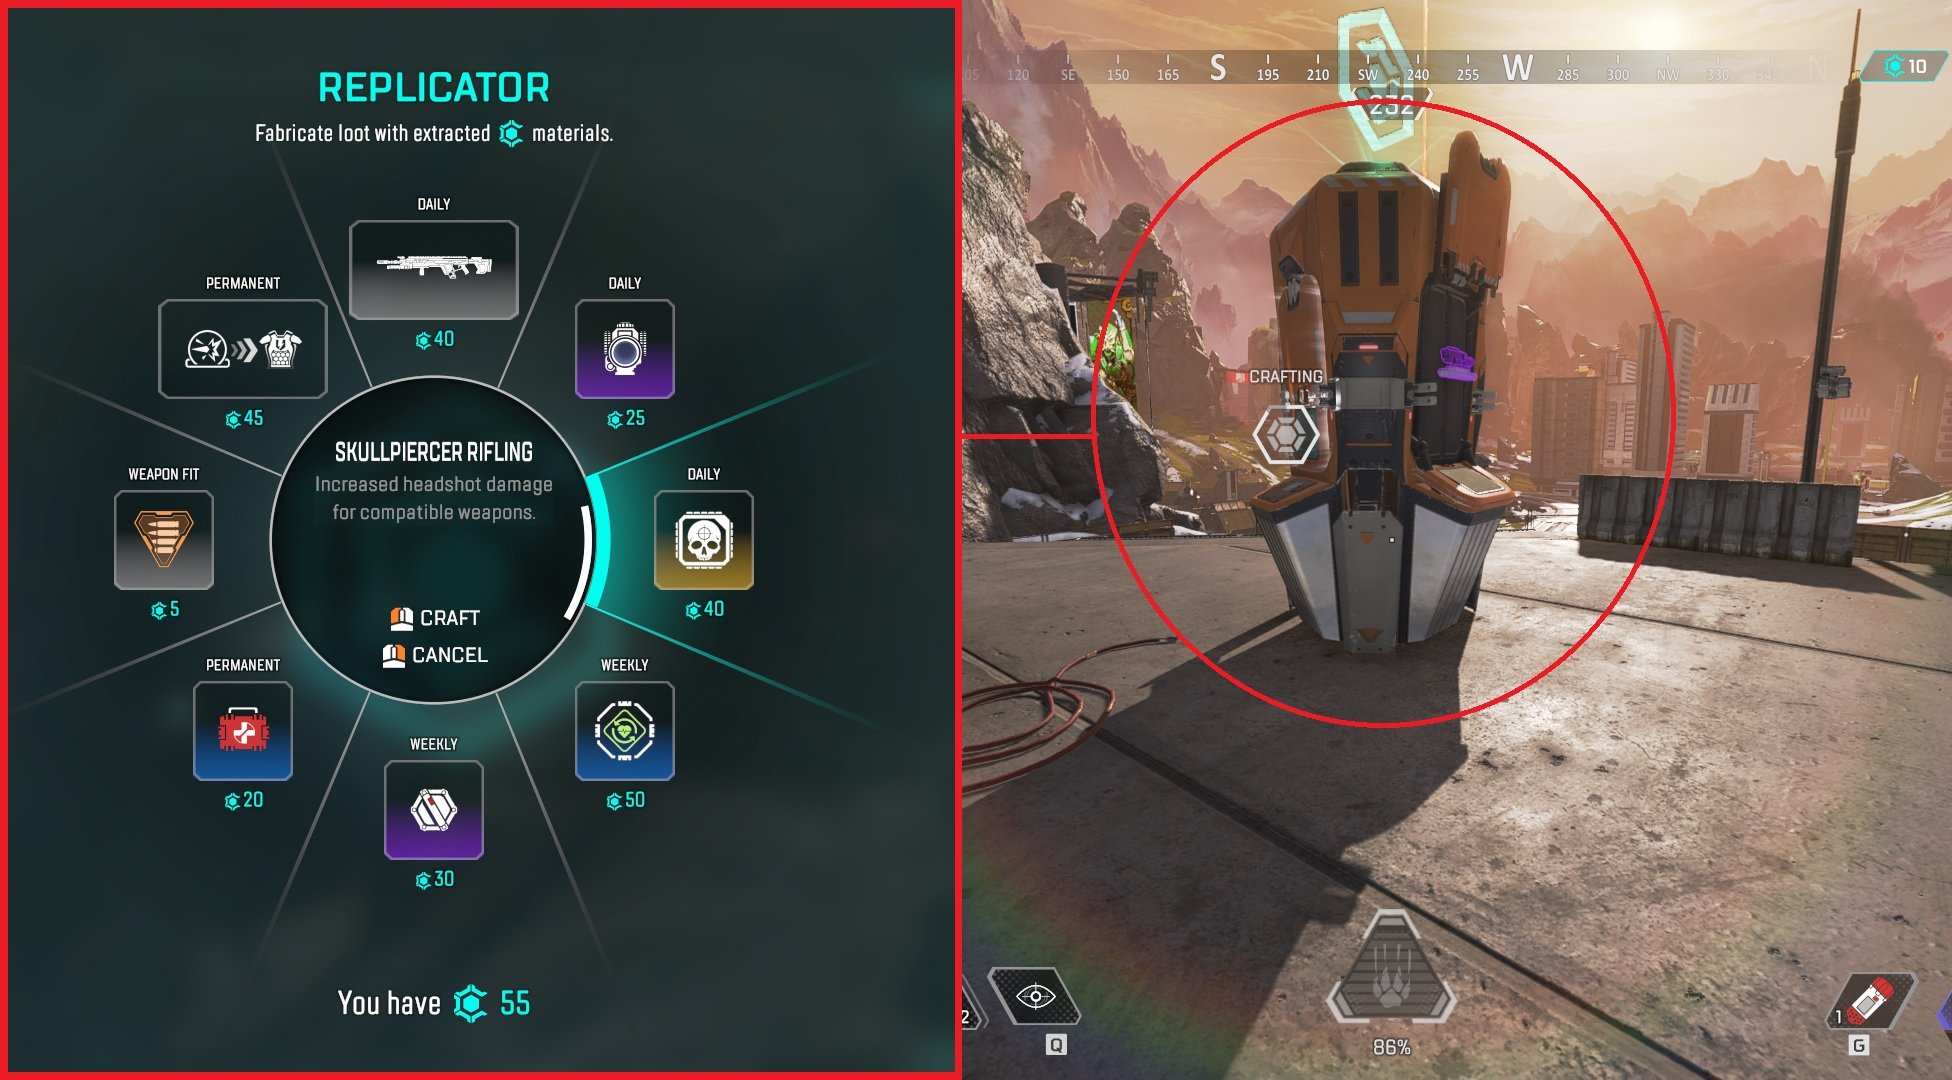
Replicator Menu (Left) | Replicator Crafting Station (Right)
The Solution
My goal was to give Apex Players worldwide a feed that would display information about what loot is available in the Replicator for the current day. I didn’t do much research on the pros and cons of each platform or potential solutions that could display information. I honestly had my sights set on Twitter as the home for my project. I knew that it was possible to send tweets programmatically, and I knew that Twitter is a fan-favorite platform amongst the internet and Apex Legends communities alike.
In summary, the solution is a Twitter account that posts a picture of a table containing all of the items that can be found in the Replicator on the current day, including attributes such as item name, rarity, cost, when the item enters and leaves the Replicator, and whether the loot item is in the Replicator for the day, week, or for the entire season.
Below on the left, you can see the most current tweets from my Apex Legends Replicator Twitter Bot. Below on the right is a screenshot of what the Apex Legends Replicator profile looks like if you were to access it via the Twitter web app on desktop. You can view or follow my profile here - @whats_crafting

How I Built the Solution
The solution was built using Python, Docker, and AWS. The solution was created using the following steps -
Get Data From the Apex Legends Status Crafting Rotation API
Clean and Format Returned JSON as a Pandas Data Frame
Convert Data Frame to an Image File
Send Image File to an AWS S3 Bucket
Read Image File Back into Script in Memory From S3
Tweet Out the Information Using Tweepy Package
Infrastructure
Python Script That Does All Steps Above is Packaged Using Docker. Container is Uploaded to AWS ECR (Elastic Container Registry)
Container in AWS ECR is Run Using an AWS Lambda Function
AWS Lambda Function is Scheduled to Run Daily By Using AWS EventBirdge (Formerly AWS CloudWatch)
Credentials for AWS, Apex Legends API, and Twitter are all stored in AWS Secrets Manager and are passed to the Python script using Boto3. Permissions on the AWS side are configured using AWS Identity and Access Management (IAM).
Each step listed above will be described in greater detail below.
You can find all of the code for this project on my Github profile - https://github.com/brandon-levan/apex_legends_twitter_bot
Prerequisites - Visual Studio Code & Docker
I initially thought that I could just zip-up my python file and packages and upload them to AWS Lambda and call it a day. Unfortunately, it didn’t work out that way (more to come on this later). For this project, if you’re following along or want to run this locally, you’ll need to have Docker installed.
You can find the install for Docker Desktop here - https://www.docker.com/products/docker-desktop/
Docker is a software platform that allows users to build, test, and deploy applications quickly. Docker packages software into standardized units called containers that have everything the software needs to run including libraries, system tools, code, and runtime. Docker, allows users to quickly deploy and scale applications into any environment. This was my first time using Docker, and I learned a lot. I will do my best to highlight the most important tips, tricks, and code you’ll need.
Visual Studio Code, also commonly referred to as VS Code, is the code editor I used for this project. You can find a download for VS Code here - https://code.visualstudio.com/download
Once you have both installed, make sure that you add the Docker extension to you workspace.

For this project, our Docker container will contain three objects (links will take you to the respective item in my Github repository for this project) -
Python File - Python script that will handle all of the data gathering, cleaning, manipulation, and other functions which will result in a daily tweet by the Replicator Twitter profile.
Requirements File - Text file listing all the dependencies for the Python project.
You can use pip freeze > requirements.txt to generate your requirements.txt after you’ve installed all your dependencies locally and run your python script.
Docker Image - A Docker image is a file used to execute code in a Docker container. Docker images act as a set of instructions to build a Docker container, like a template. Docker images also act as the starting point when using Docker.
To create a Docker image, you can use the following command
While you could pull this repository straight to your local instance, you’d have a few issues running the script because you’ll need to set up some credentials first -
Apex Legends API Credentials
Twitter API Credentials
And if you want to run the code using AWS you’ll need to install AWS Command Line Interface (AWS CLI) and configure your credentials using AWS CLI and AWS Identity and Access Management (IAM). More on this part later.
First, let’s start off with getting access to the Apex Legends API.
Step 1 - The Apex Legends API

Before I even began scoping out the technical portion of this project, I had the question “Where can I get data about the items in the Replicator each day”? After a few quick Google searches, I came across the Apex Legends API; the unofficial apex legends API, aimed at providing an easy way for developers to access Apex Legends player data and also general game data.
The Apex Legends API has information on leaderboards, match history, player stats, map rotations, news, server status, AND CRAFTING ROTATION! When you hit the following end-point using your API key, you’ll get a JSON of the current items that can be crafted in the Replicator. You’ll see later on how I change the data returned in the JSON into a data frame, but for now, all you need to do, if you are following along, is to create an API key using this link - https://portal.apexlegendsapi.com/
From what I recall, your API key is generated very quickly, if not immediately.
Step 2 - Twitter API
You might have heard about Twitter bots in the news recently with thanks to Elon Musk trying to purchase Twitter. His claim is that Twitter has more bots than they are reporting to him, and this project has just added (read in DJ Khaled’s voice)…

That’s right. We are going to need a set of API keys to access our Twitter profile programmatically so that we do not have to manually draft up and tweet out our Replicator news each day.
You’ll first need to -
If you don’t already, create a Twitter profile that you’ll want to have your tweets displayed on.
Go to apps.twitter.com and request access for a developer account.
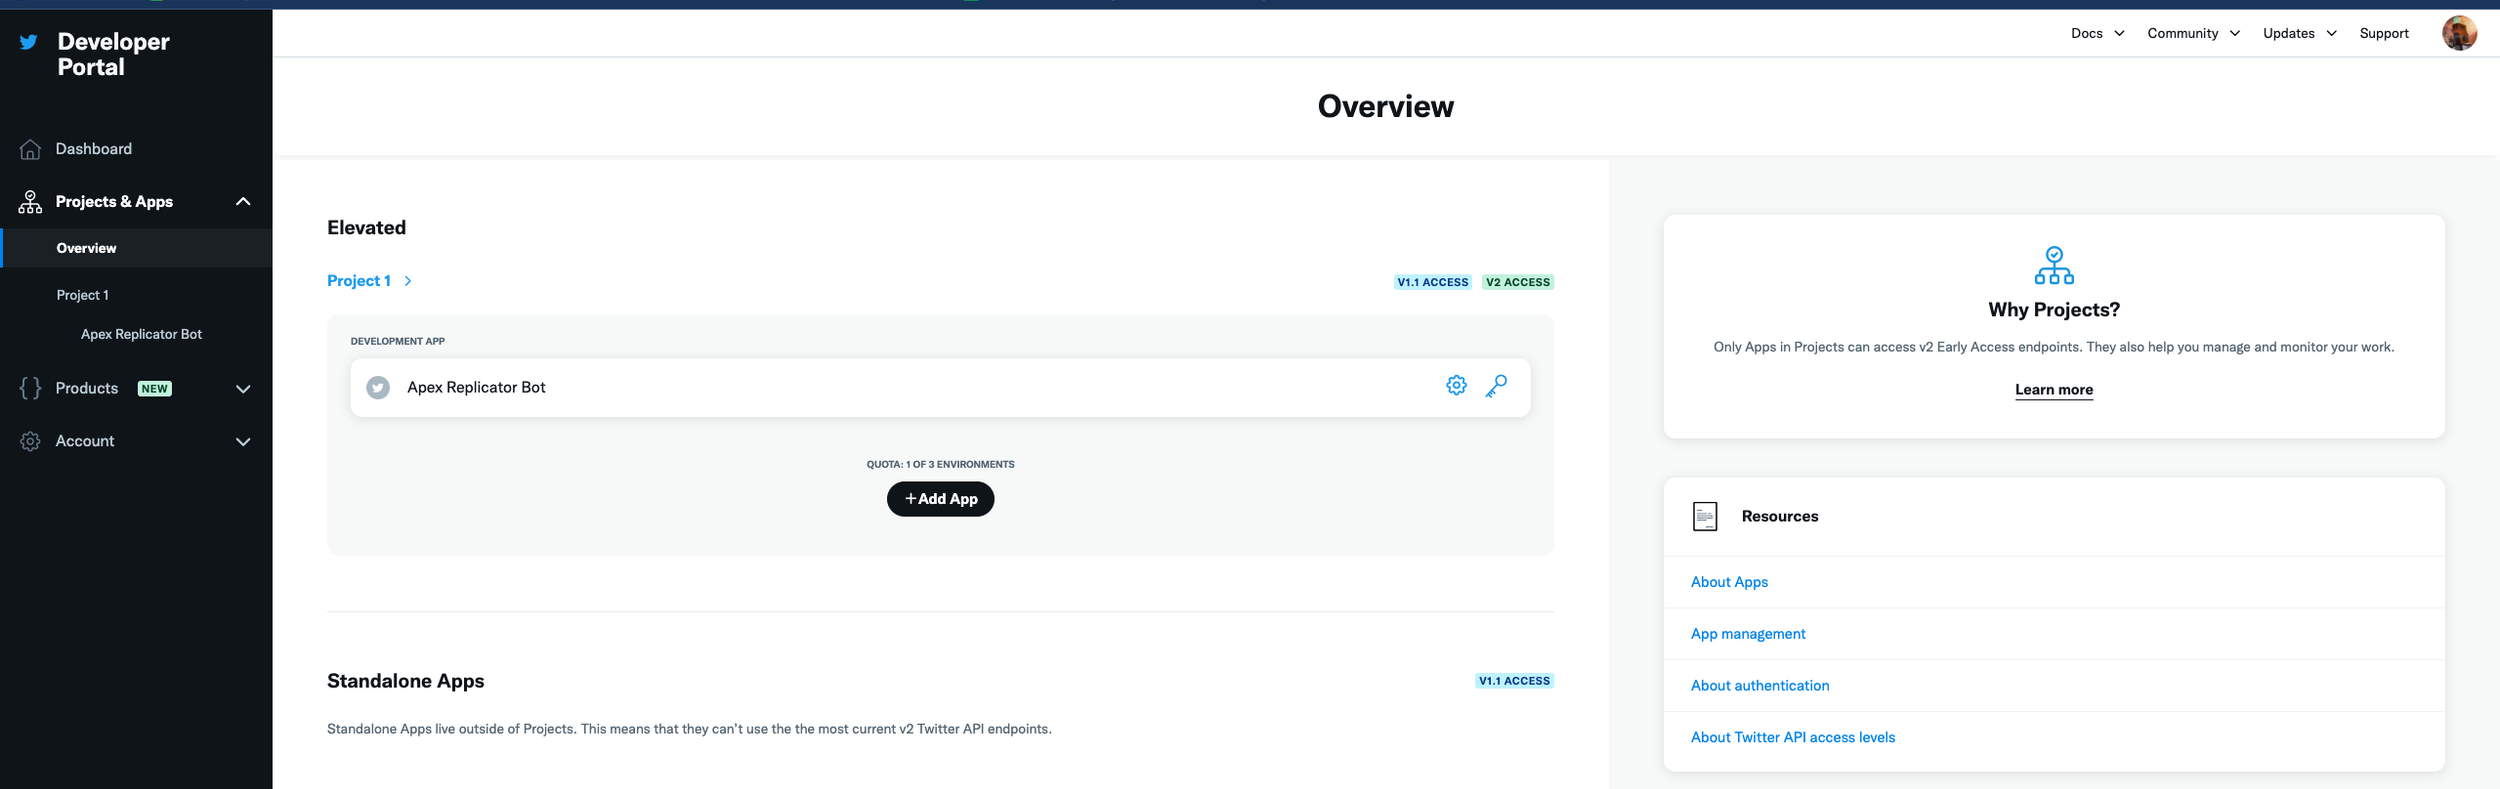
Once you have access to the Developer Portal, click on “Create App” or “Add App”.
Add your application name and details and proceed to generate your keys & tokens.
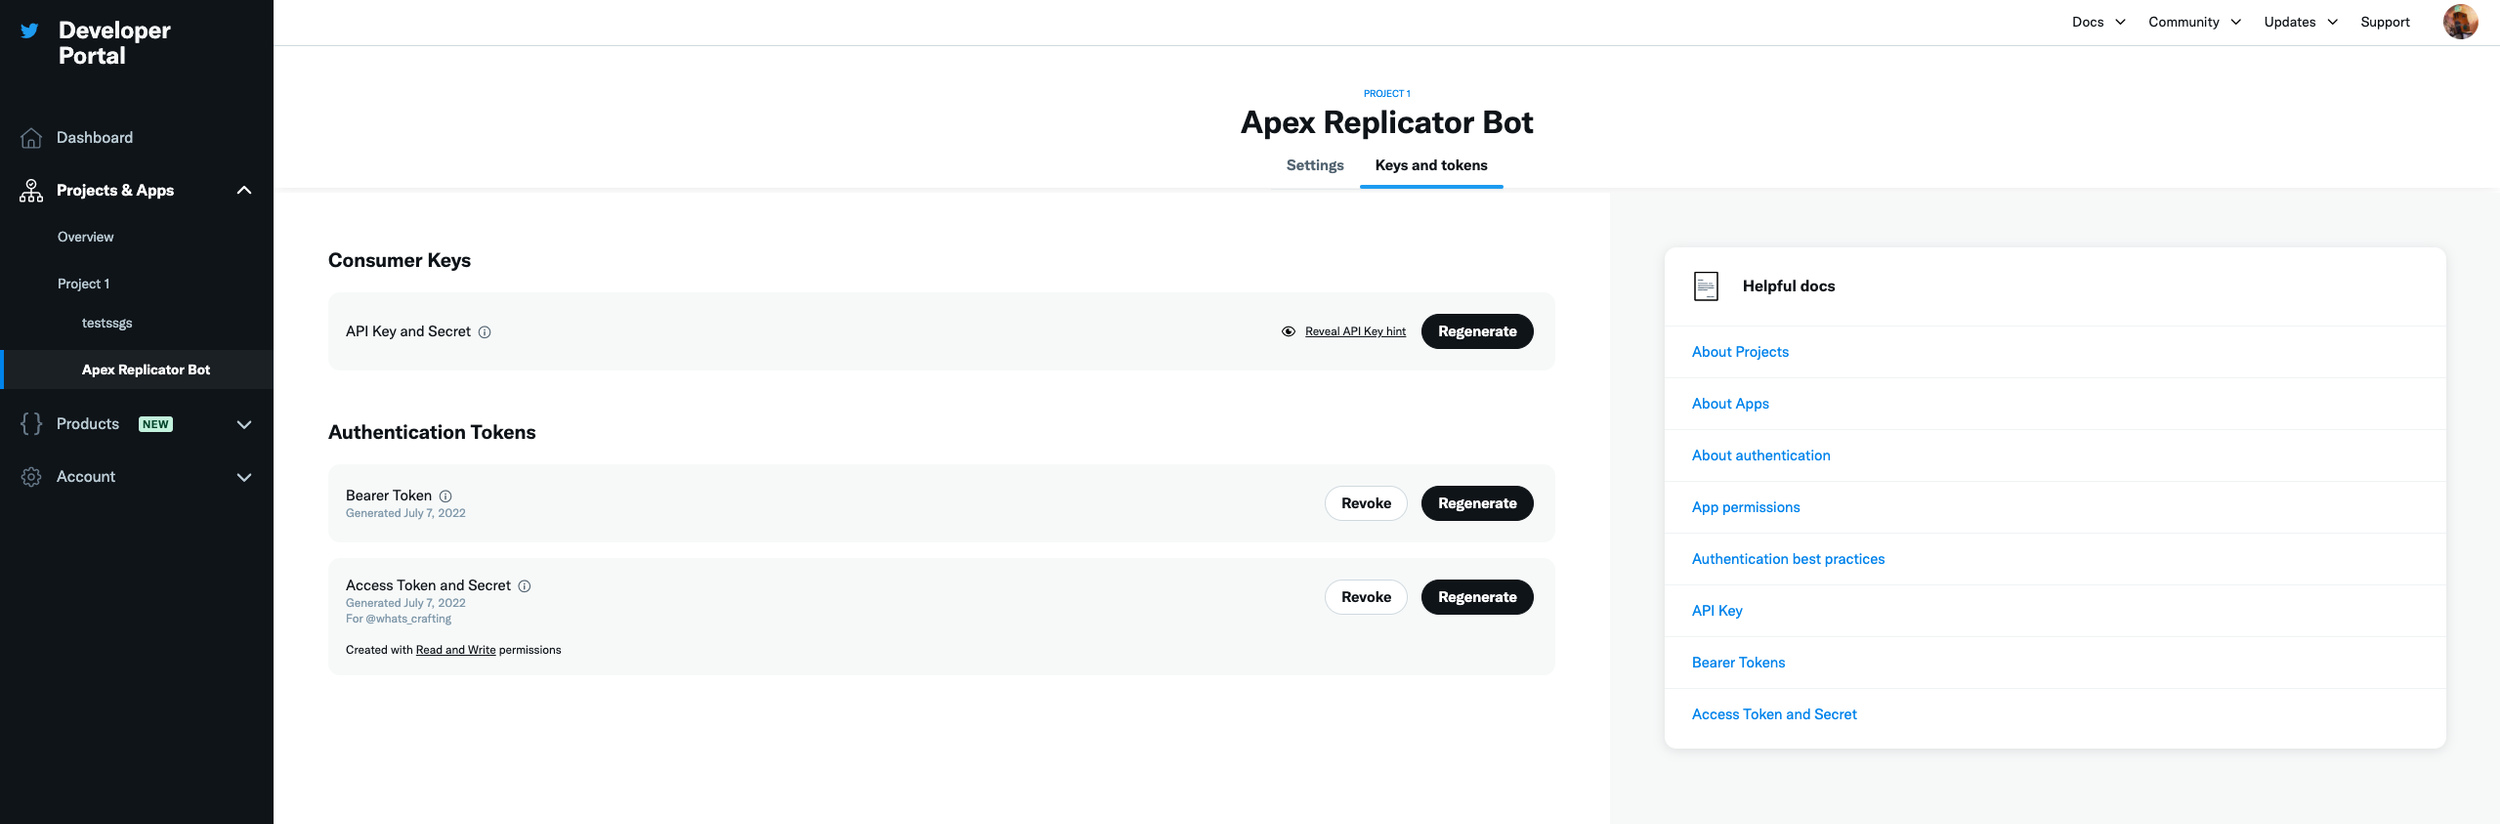
You should see an API Key, API Key Secret, Bearer Token, Access Token, and Access Secret. You’ll need all five of these values available later so save them somewhere safe for now. We will be adding these values to AWS Secrets Managers so that we don’t have to hard code these values in our Python script.
If you click on the name of your project on the right-sidebar, and then click on Keys and Tokens towards the middle of the page, you should have the ability to see all five of these values (see second screenshot in the gallery below).
Now that you have these keys to access your Twitter profile, we will be able to tweet out any message or media programmatically using our Python script leveraging the Tweepy library. More on this package later.
Step 3 - Python Script
This section will be broken down into many parts. Please note that, this was my first time working in AWS, and subsequently, my first time using Python to work with AWS. There was a lot of trial and error when writing out this script, and I spent many days, reading through Stack Overflow and related documentation. Also please be aware that there may be better or alternative ways to end up at the same outcome as I did. Feel free to drop suggestions or recommendations in the comment section at the end of the article if you would have done something differently or if you have any tips/tricks you’re willing to share.
How to Interface with AWS - Storing & Retrieving Credentials
It’s bad practice to hardcode credentials into your script. If you ever wanted to publish your code online, you’ll have your keys available for the world to see. So what do you do?
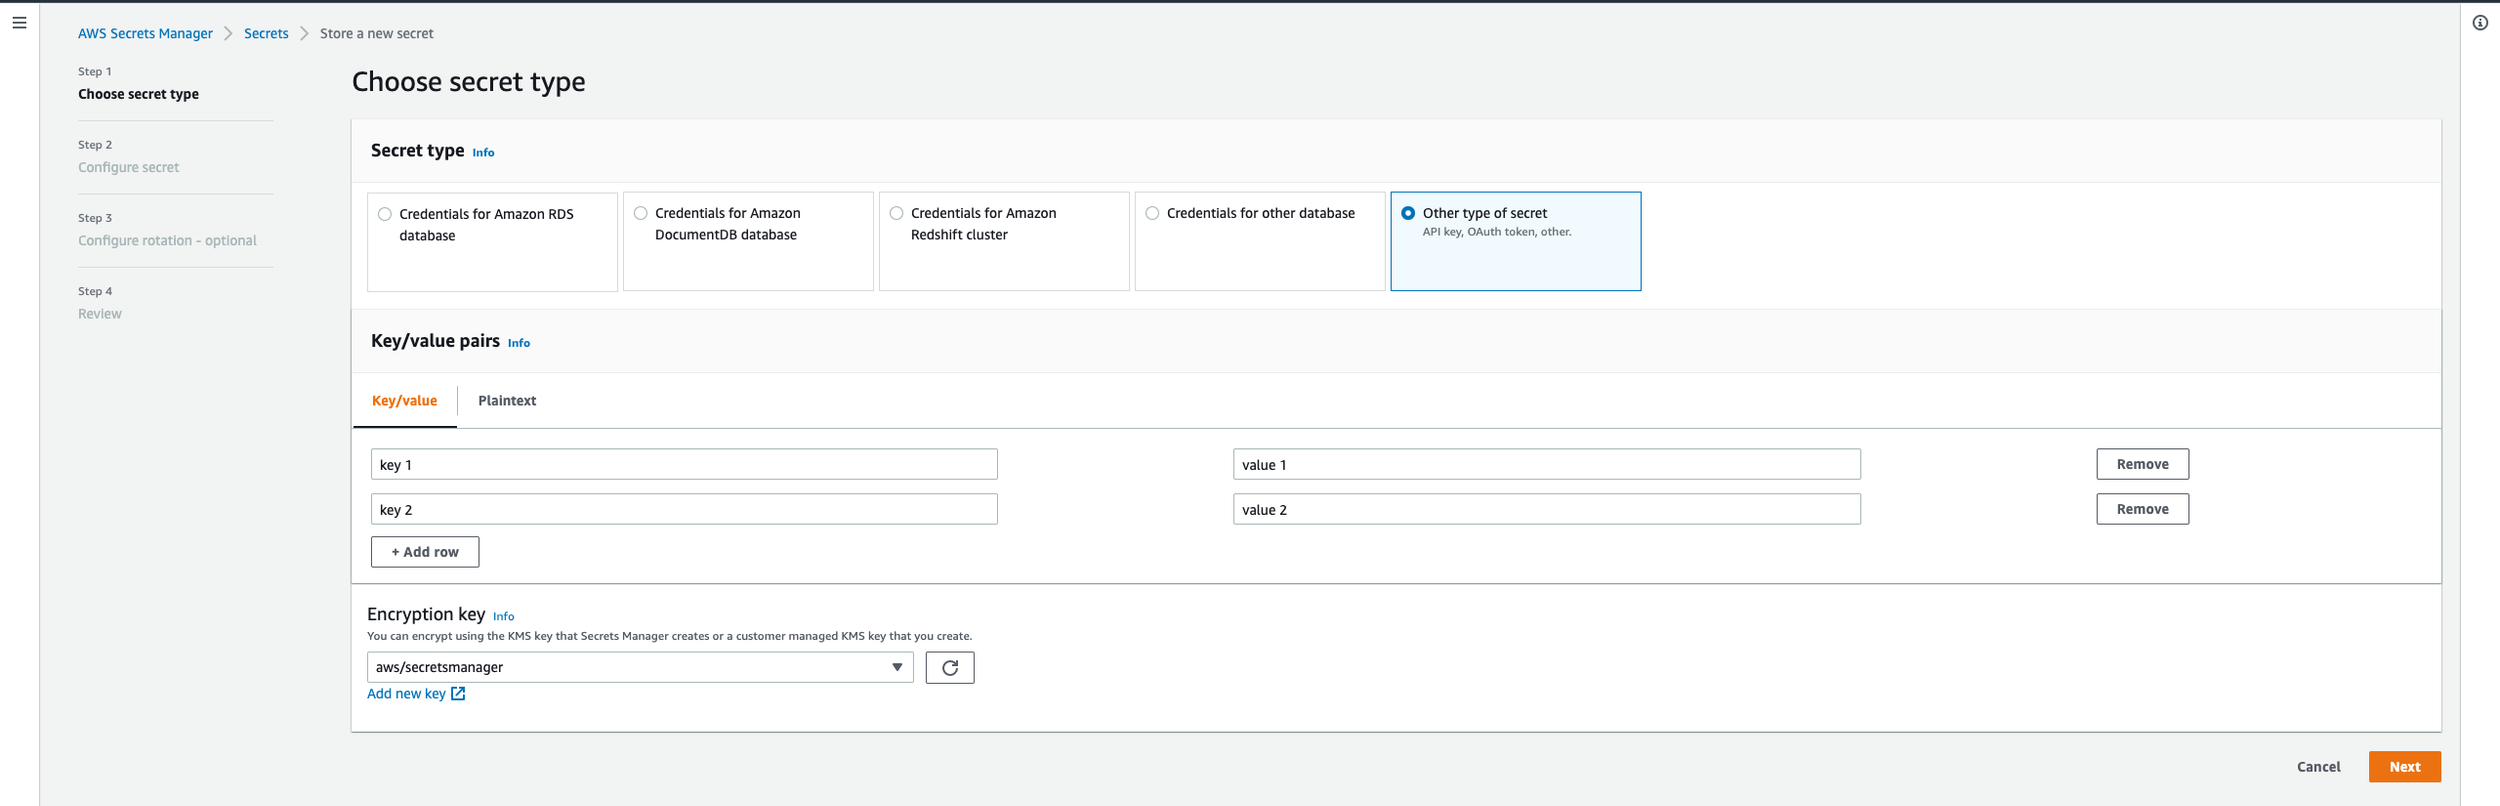
Boto3 is the name of the Python SDK for AWS. It allows you to directly create, update, and delete AWS resources from your Python scripts. For this use case, we will need boto3 to communicate with AWS S3 and AWS Secrets Manager. AWS Secrets Manager helps you to securely encrypt, store, and retrieve credentials for your databases and other services. Instead of hardcoding credentials in your apps, you can make calls to Secrets Manager to retrieve your credentials whenever needed. Secrets Manager helps you protect access to your IT resources and data by enabling you to rotate and manage access to your secrets.
If you don’t already have a free AWS account, now is a good time to create one. After you create an account, if you are following along, you’ll want to search for and go to Secrets Manager. After that, click on “Store a New Secret”. You’ll want to enter in the key and value pairs that represent the name/use of the api key and the api values, respectively. For example, the secret key might be apex_api_key and the secret value might be “isahfpioahs0fiasfasa9eg-a93"". After you add all of your key/value pairs (Twitter, Apex, S3) as seen in the screenshot below, hit next, and then add a “Secret Name” which is just a descriptive name that helps you find your secret later. The secret for the S3 bucket will be the same as the secrets for your IAM User, which I will explain a little bit further on.
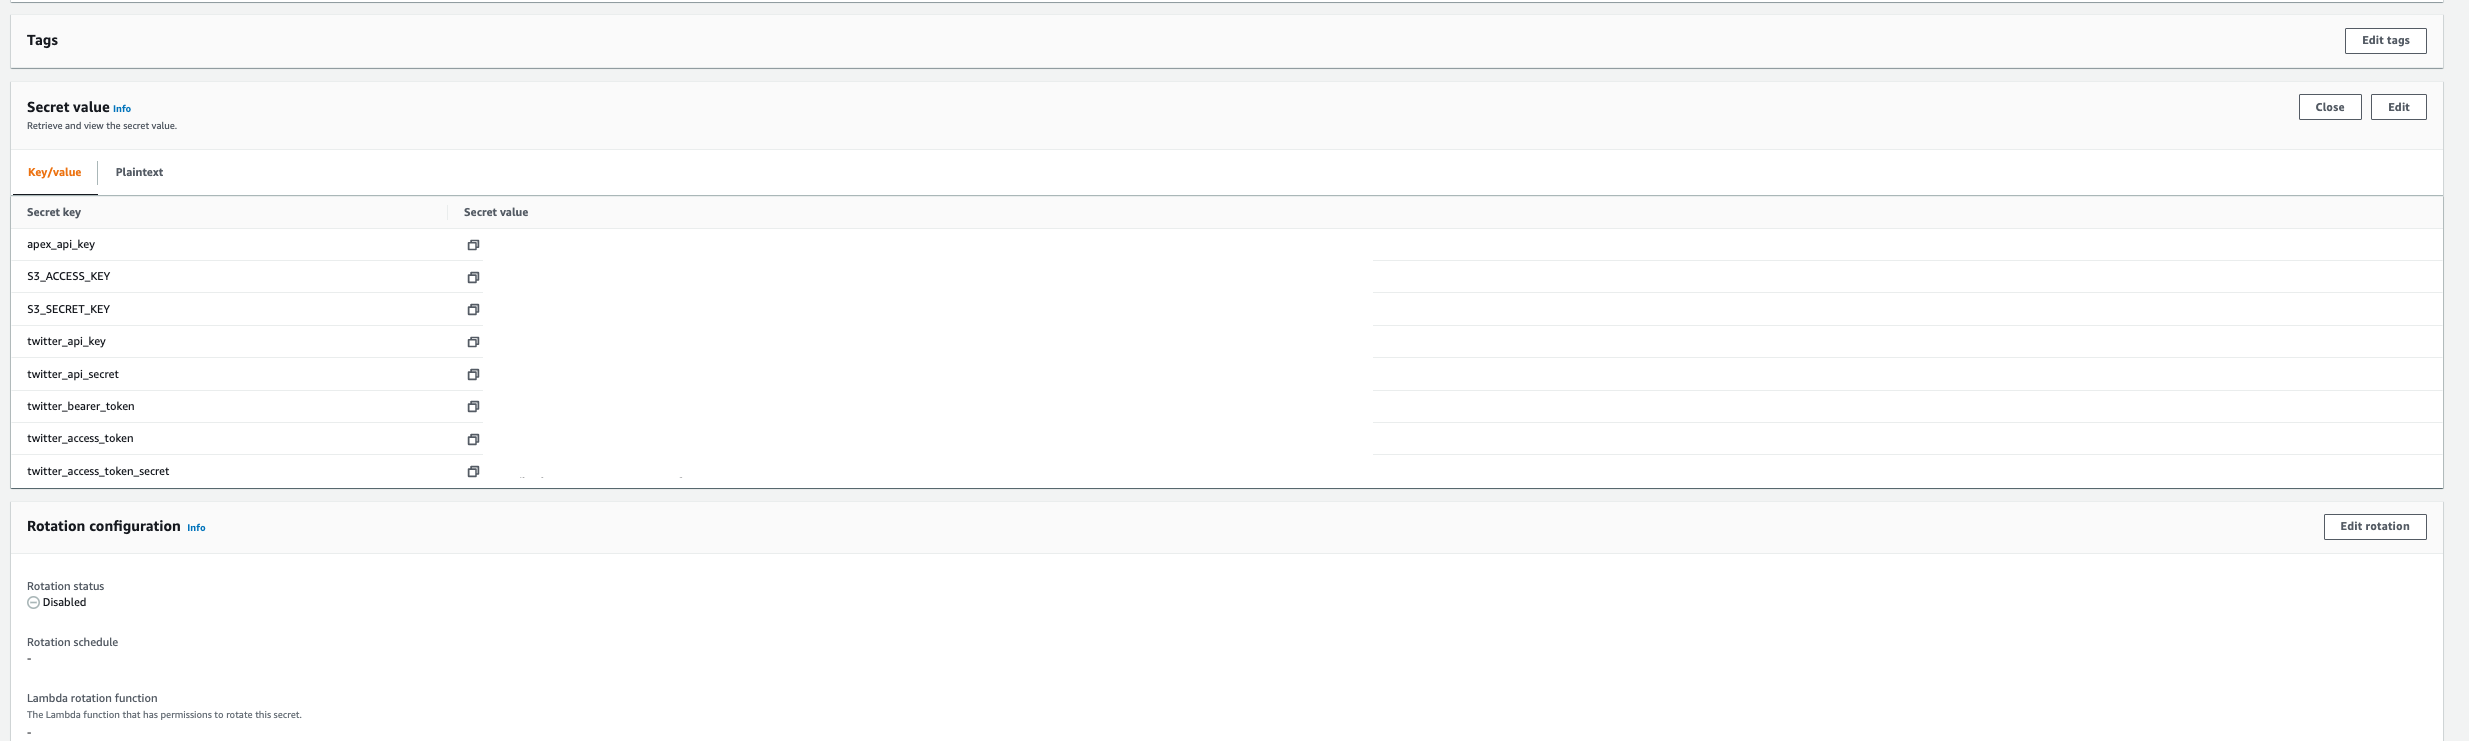
Why do we do this? In the code, when we need to request data from the Apex Legends Crafting End Point, we need to ask AWS Secrets Manager for the passwords that will allow us to get this information. You’ll see in the script that first we make a call to AWS Secrets Manager using boto3 to get the key and value for the Apex Legends Crafting End Point. This value is stored as a variable and then used to request data from the Apex Legends Crafting End Point. Never once was a secret hardcoded in the script.
But Brandon, don’t we need credentials to access AWS Secrets Manager to even retrieve our secrets in the first place? The answer is YES. However, for this we will need to create an AWS Identity and Access Management (IAM) role and install the AWS Command Line Interface (CLI). The AWS CLI is an open source tool that enables you to interact with AWS services using commands in your command-line shell. With minimal configuration, the AWS CLI enables you to start running commands that implement functionality equivalent to that provided by the browser-based AWS Management Console from the command prompt in your terminal. This AWS CLI Configuration Basics Guide is a really good resource to follow.
To get started, first you’ll want to create your AWS IAM access keys which allow you to use an access key ID and secret access key to sign programmatic requests to AWS.
To create access keys for an IAM user (comes straight from the guide I linked above)
Sign in to the AWS Management Console and open the IAM console at https://console.aws.amazon.com/iam/.
In the navigation pane, choose Users.
Choose the name of the user whose access keys you want to create, and then choose the Security credentials tab.
In the Access keys section, choose Create access key.
To view the new access key pair, choose Show. You will not have access to the secret access key again after this dialog box closes. Your credentials will look something like this. You’ll need this in the AWS CLI configuration step below.
Access Key ID: AKIAIOSFODNN7EXAMPLE
Secret Access Key: wJalrXUtnFEMI/K7MDENG/bPxRfiCYEXAMPLEKEY
To download the key pair, choose Download .csv file. Store the keys in a secure location. You will not have access to the secret access key again after this dialog box closes. Keep the keys confidential in order to protect your AWS account and never email them. Do not share them.
After you download the
.csvfile, choose Close. When you create an access key, the key pair is active by default, and you can use the pair right away.
Once you have a IAM user created, you’ll need to assign permission/policies to the user. This tells AWS that the user (that which is assigned to your AWS CLI) can have full read/write access to certain AWS services. You’ll see in the screenshot below that my user has access to ECR, S3, and Secrets Manager. Without adding these permissions you will not be able to interface with AWS.

Next, you’ll want to make sure you have the AWS CLI installed on your desktop. To do this, you can follow this installation guide, but i’m pretty sure that I ended up just doing pip3 install awscli in my terminal, and hit enter. This should begin the installation process. Once installed, you will then set up your AWS CLI installation so that you can interface with AWS services.
In your terminal, enter in aws configure, and hit enter. When you enter this command, the AWS CLI prompts you for four pieces of information -
Access Key ID - From the IAM user setup
Secret Access Key - From IAM user setup
AWS Region - In my configuration, I used us-east-1
Output Format - In my configuration, I used json (lowercase).
It’ll look something like this in your terminal.

The AWS CLI stores this information in a profile (a collection of settings) named “default” in the credentials file. By default, the information in this profile is used when you run an AWS CLI command that doesn't explicitly specify a profile to use. When you use Boto3 to use AWS Services programmatically, Boto3 knows to look for your credientials file and use the information stored there as the credentials. AWS configure paired with Boto3 allows for users to not have to hard code credentials into their scripts.
At this point you should now have a IAM user set up and the AWS CLI installed and ready to use. Let’s test it out with AWS Secrets Manager and see if it works.
AWS Secrets Manager Continued
As I mentioned before, we do not want to hard code our API keys and passwords into our Python Script because it’s a security risk. Instead, AWS Secrets Manager allows us to store our passwords so that we can call them directly into our script so that we can use them in our other API calls, such as the one to the Apex Legends Replicator API. Previously, we set up and got keys/values for the Apex Legends Replicator API, Twitter API, and for S3 (which is the same . If you haven’t already, let’s take all of these passwords and add them to AWS Secrets Managers so we can access them later in our code. That will look like this. Feel free to use the same secret key names so it’ll work with the script.

Once you have your secret values set, and your IAM user roles and permissions configured, you should be able to work with AWS services using boto3. The following code block, if you choose to run it locally, will return all of secret values you have stored in Secrets Manager. You’ll see that I get each key individually in the script depending on which credentials I need.
Don’t forget to install and import the necessary packages before running the code block above otherwise it will not work.
Now that we can access our API credentials through S3 using Boto3, we can start working with our Apex Legends Replicator data and moving towards our final product.
Get Apex Legends Replicator Data, Clean & Transform It
By now, you’ve hopefully completed Step 1 and have your Apex API Key and AWS CLI configured. You’ll need it for this section. Here’s the entire code block for this section. I’ll break it down into smaller, more digestible parts after the block.
While the code above is annotated, here’s quick step by step breakdown of everything that is happening -
Import Libraries
Make Call to AWS Secrets Manager
Use Credentials from Secrets Manager in Call to Apex Legends API to Return Replicator Data JSON
Retrieve Raw Data (JSON), Flatten It, & Convert to Pandas Data Frame
Manipulate Data in Data Frame to be in a Human Readable Format
Remove Unnecessary Loot Such as Ammo for Each Type of Weapon Class (Heavy, Light, Energy, Sniper) and Just Call it Ammo
Rename Columns
Make Everything Title Case
Convert Datetimes From UTC to EST
Replace Blank Values With ‘-’
Drop Index to Just Display Apex Data
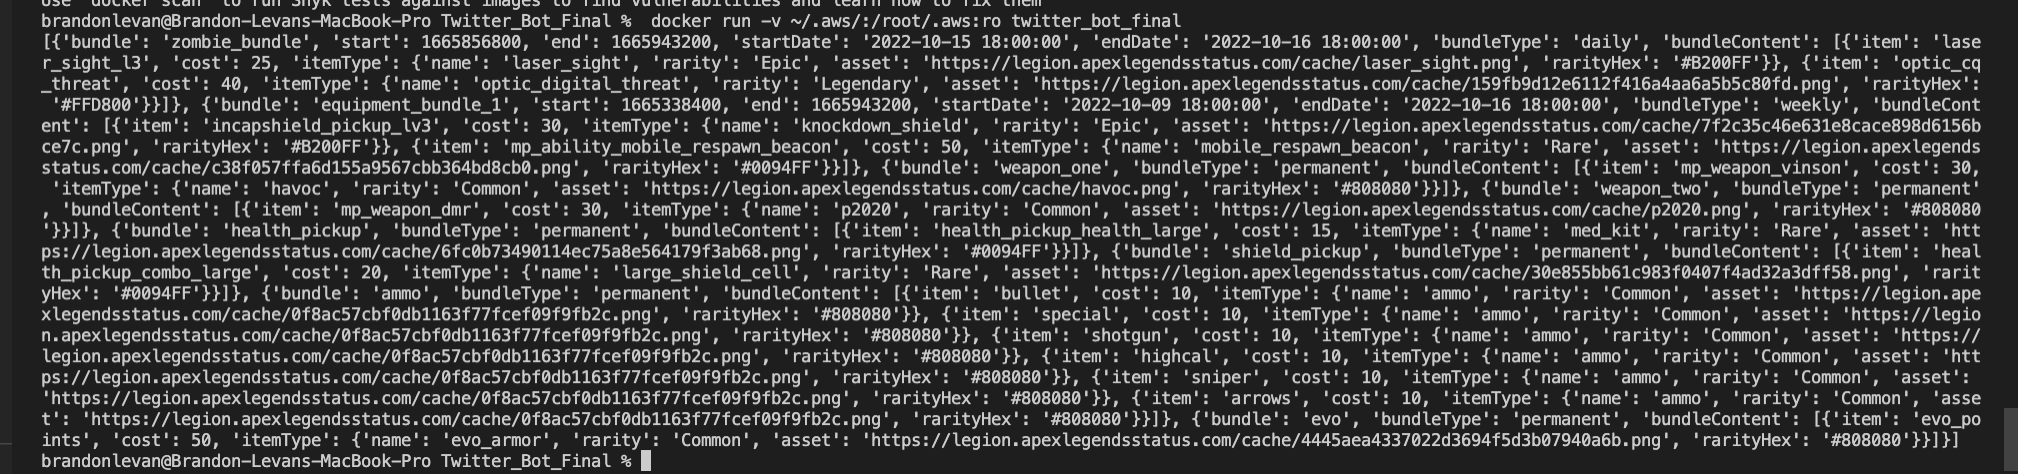
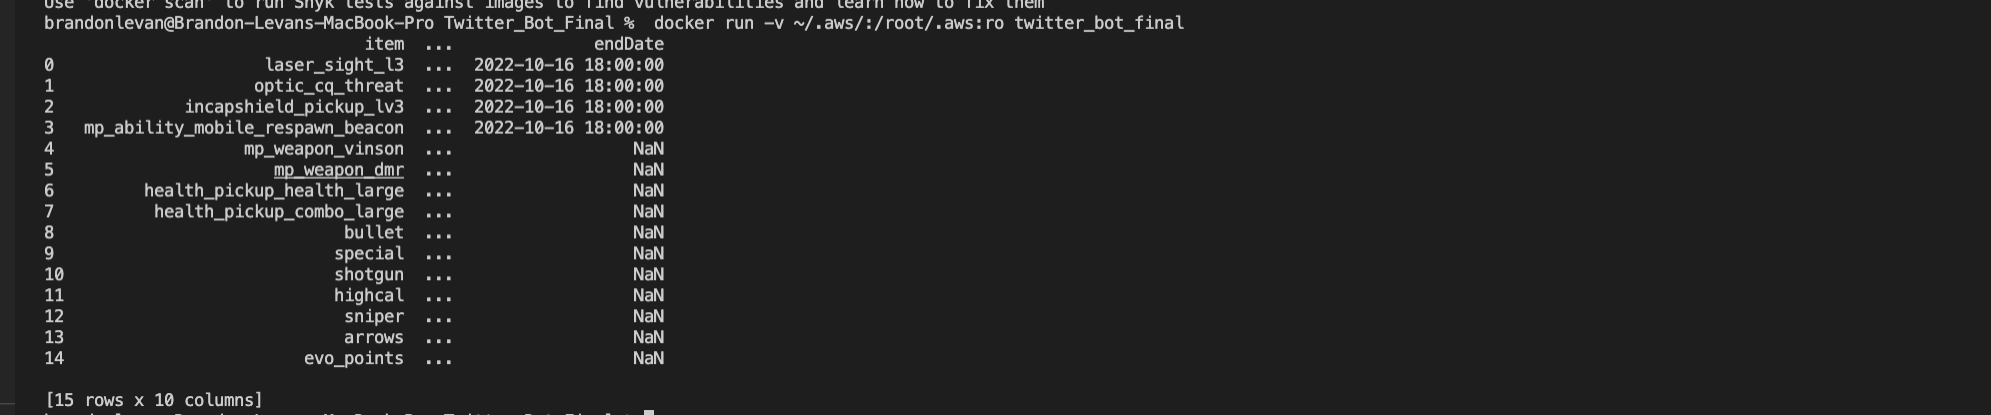
The screenshot below is of the raw data and the data after it is flattened. I was doing the development of the script originally in a Jupyter notebook, but moved into visual studio to work with Docker. For this reason, it’s not as easy or clean to display what the data looks like, but hopefully this will do.
Delete Whatever Is Currently Stored in S3
You might be asking yourself right now, what is S3 and what are we deleting from there. First off, Amazon S3, otherwise known as Amazon Simple Storage Service, is an object storage service offering industry-leading scalability, data availability, security, and performance. Amazon S3 is built for storing and recovering any amount of information or data from anywhere over the internet, and it provides storage through a web services interface, but we will be accessing it using Boto3, much like we did with AWS Secrets Manager.
What will we be storing in S3? Remember that this project was started to create a Twitter bot that would tweet out what loot is available in the Replicator each day. Twitter only allows for 280 characters of text in a tweet, and with all the items in the replicator and its metadata, this would exceed the limit. The way I decided to overcome this was by taking the data we have, organizing it in to a table, converting the table to an image, and tweeting out the image with all of the information in it. Since this application will live in the cloud, I cannot just take a screen capture of the table each day and upload the image from my desktop into the tweet. I need to tell the application where to look for an image to tweet, and the application needs to know to tweet out the right image. Instead of storing the image of the table on my desktop, the image will be stored in an S3 Bucket (imagine a folder) and will be titled accordingly. Each day the script will pull the latest Replicator data, transform the data into a data frame, convert the data frame to an image, write the image to our designated S3 bucket, download the image out of our S3, and finally, tweet out the image out the data frame.
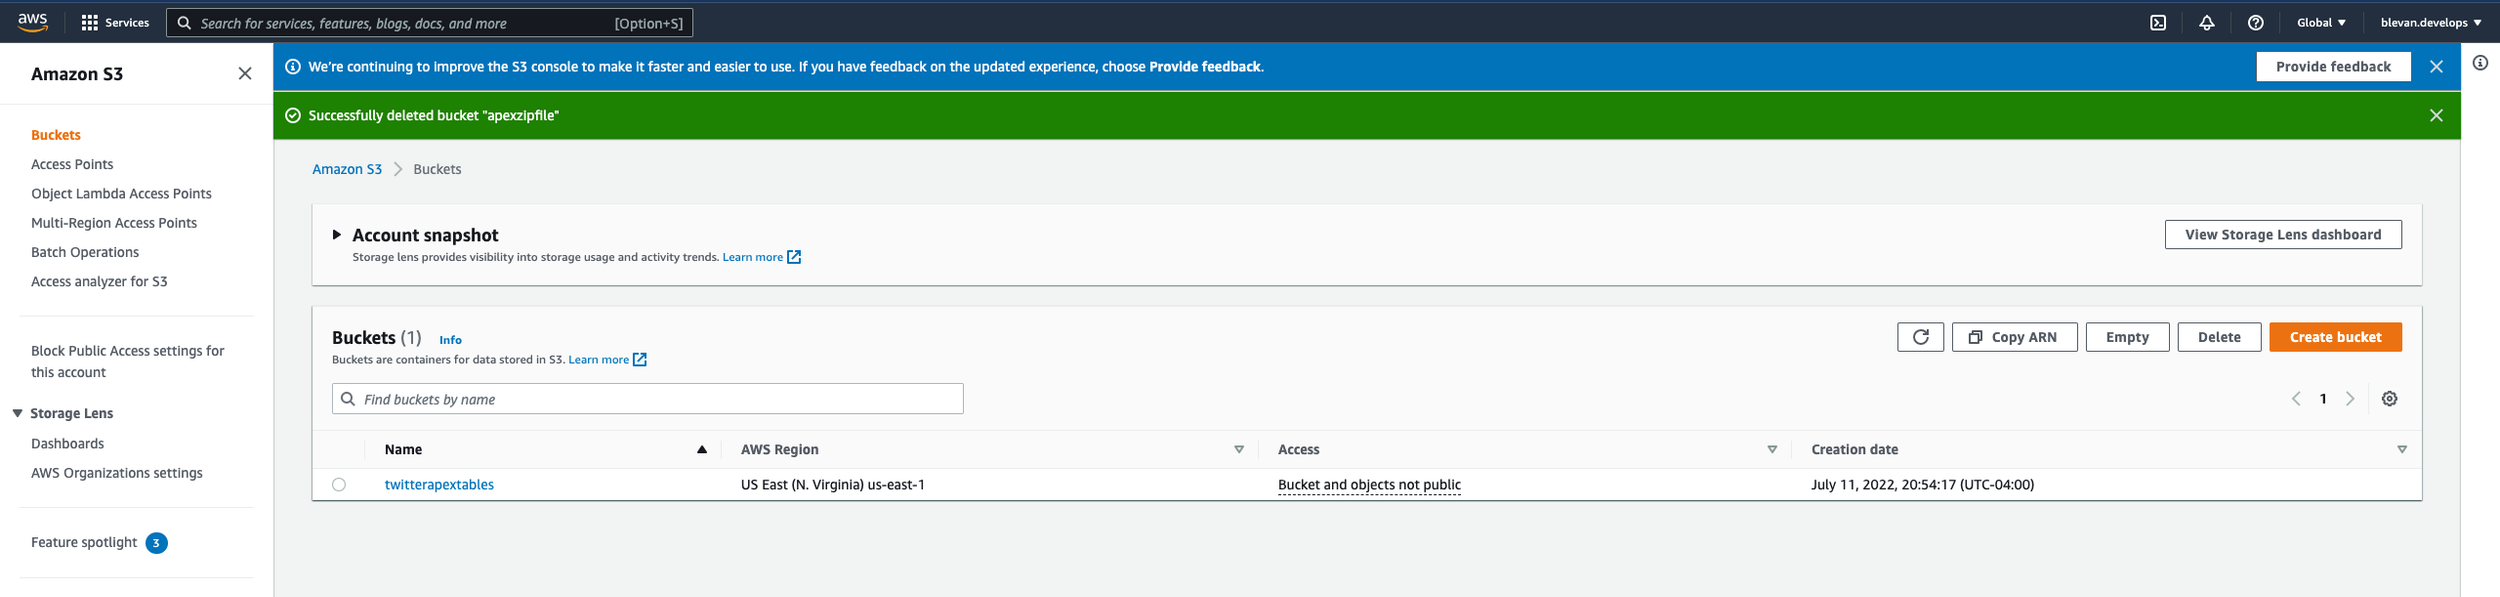
To ensure that we don’t tweet out the wrong image file, the first thing we do is delete everything out of the S3 bucket. The following code block, which is a function named s3_delete, does just that. The function -
Establishes a connection to Secrets Manager to get the credentials to access S3
Credentials are used to access the twitterapextables bucket in S3 and all objects are deleted from this bucket
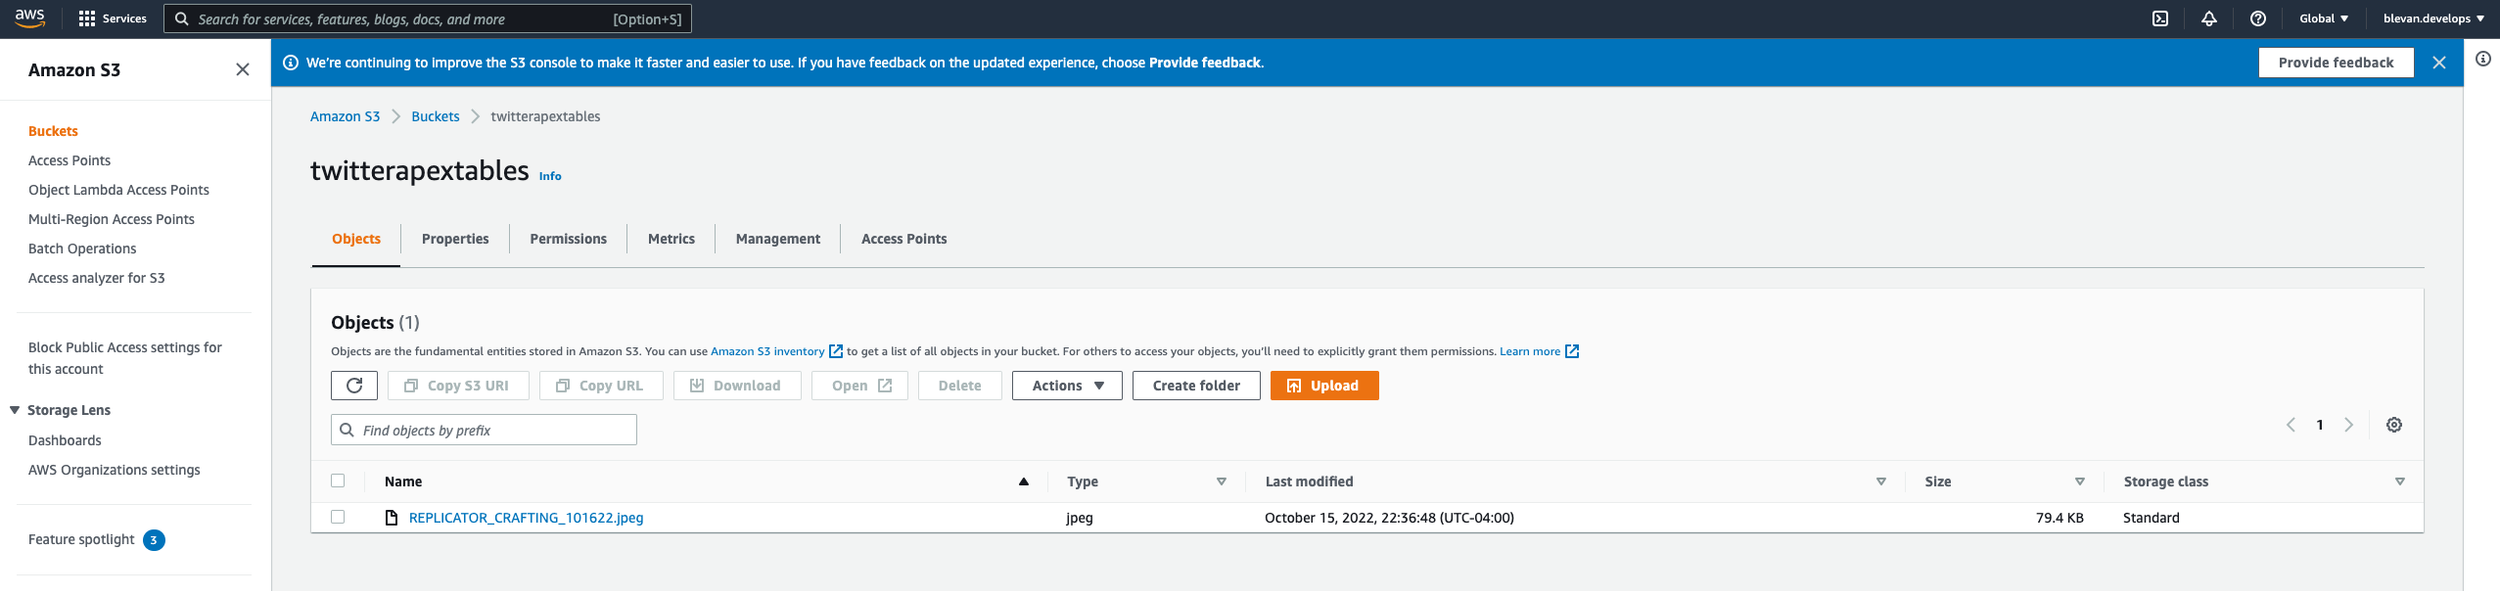
If you go to AWS and go to S3, you’ll see “Create bucket”. Creating a bucket is much like creating a folder on your desktop to store files in. If you want to follow along with the code, you can name your bucket “twitterapextables”. The script will write images to this bucket and the files will be named filename = 'REPLICATORCRAFTING' + date + '.jpeg' , which you’ll see next in the s3_write function. In the screenshot below, you’ll see the file is named “REPLICATOR_CRAFTING_101622.jpeg”.
Convert Dataframe to an Image & Write Image to S3
Now that we’ve deleted all the old objects out of our S3 bucket, we can now write the current day’s data to the bucket. This function starts out much like s3_delete does. First, we establish a connection to Secrets Manager to get the credentials for S3. The next steps are different though.
First, we import date from datetime so that we can create a variable that will represent the file’s name once written to S3. As mentioned briefly in the previous section, the naming convention will be filename = 'REPLICATORCRAFTING' + date + '.jpeg'.
Next, we use a library called dataframe-image to help us convert the pandas data frame into an image file (.png).
The image file is stored in memory using BytesIO()
This is concept is honestly not something that I fully understand but is needed because when the data frame is converted to an image, it needs to be stored somewhere so that it can be uploaded to S3. Because the script will live in the cloud, we cannot convert the data frame to an image to save locally to our desktop, and then upload it to S3. Everything has to be done in the cloud. A BytesIO object isn't associated with any real file on the disk. It's just a chunk of memory that behaves like a file does. Additionally, BytesIO can be useful when you need to pass data to or from an API that expects to be given a file object, but where you'd prefer to pass the data directly. You can load the input data you have into the BytesIO before giving it to the library. After it returns, you can get any data the library wrote to the file from the BytesIO using the getvalue() method. This isn’t the best article, but there’s some more bullets on BytesIO here. At the end of the day, data can be kept as bytes in an in-memory buffer when using the io module’s Byte IO operations.
Call getvalue() on the image stored in memory and write it to our S3 bucket.
Might be a little confusing that I named the variable that stores the object as PNG but when the image writes to S3, the image type is .jpeg. Not the best naming, but let’s roll with it.
At this point, we should now have today’s Replicator items in an image file that was converted to an image from a data frame using dataframe-image. Next is the part we’ve all been waiting for, THE TWEET.
Tweeting
This last part is pretty straight forward. Get the image we just wrote to our S3 bucket and tweet it out using a Python library called Tweepy, an easy-to-use Python library for accessing the Twitter API. You’ll see in the code block below that we create a function called create_tweet(). In this function, we
First, rebuild the variable that creates the image name. We do this because we will want to obtain the file with the same name as the one that was just written to S3.
Next, we establish a connection with Secrets Manager to get the S3 credentials so that we can get the object and save the object in memory.
From Secrets Manager, we then obtain all of the API credentials needed for Tweepy.
Using Tweepy, we set up two things
The message of the tweet
This will be "Crafting as of " + today’s date, where the date is defined as the current date.
The media attached to the tweet
This will be the image of the data frame that has been transformed from the initial raw data from the Apex Replicator end point into a image for the world to see.
Lastly, the Tweetpy function update_status is called which takes the message and image and immediately posts to the Apex Replicator Twitter Account that I set up in the beginning steps of this write-up.
The last few sections, we defined a handful of functions; s3_delete(), s3_write(), and create_tweet(). All of these functions must be called at the end of the script so that the steps within each function execute. The last thing we do in the script is execute the functions as seen in the code block below. I’ve added some sleep functions in so that there is a delay between writing and reading to and from our S3 bucket incase there is any delay in writing. We want to make sure that the image is available in the S3 bucket before we read from it.
Now that the script is written out and explained, it needs to be hosted on a platform that runs in the cloud so that we do not have to manually touch any part of the process. The script will live in a Docker container which will be deployed to ECR. We will then use our AWS Lambda Function to manage and run our ECR Instance. More on this in the next section.
Step 4 - Using Docker, Lamba & ECR to Host our Application
How do Get the Script Running in the Cloud From Our Local Machine
If you remember from the prerequisites section, we discussed that by using a Docker container, we could essentially package up our script and dependencies into a container to be executed by the Docker image. The Docker image acts as a set of instructions to build the container we made. You can build and run the container locally, and the script will execute. However, like we mentioned before, we do not want to be running this locally, so we need a way of adding this application to the cloud and have it be triggered to run daily. Enter AWS ECR & AWS Lambda.
AWS ECR, otherwise known as Amazon Elastic Container Registry, is a fully managed Docker container registry that makes it easy to store, share, and deploy container images. AWS Lambda is a serverless, event-driven compute service that lets you run code for virtually any type of application or backend service without provisioning or managing servers. With that being said, what if we could use AWS Lambda to run code stored in a Docker container hosted on AWS ECR? That’s exactly what we are going to do.
First thing is first, if you want to build, run, and test your Docker container locally before pushing to ECR, you can use the following commands
The first command compiles the docker container and the second command runs everything in the Docker container. That last command also mounts your AWS IAM credentials to the container so that you can use those to interface with AWS Secrets Manager in the script. Hopefully this is now running locally for you and is tweeting out the latest Apex Replicator data through your Twitter profile.
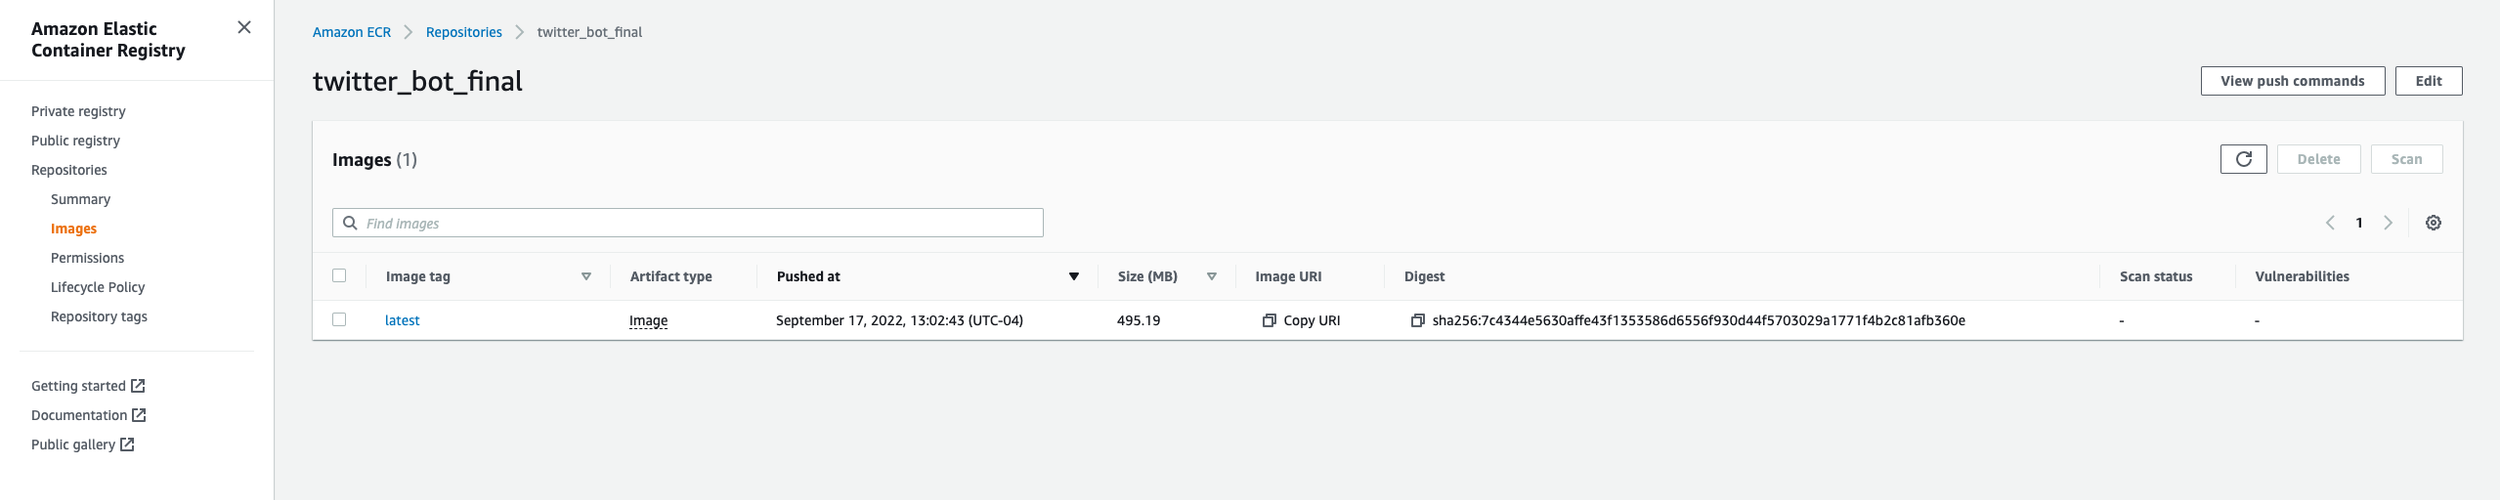
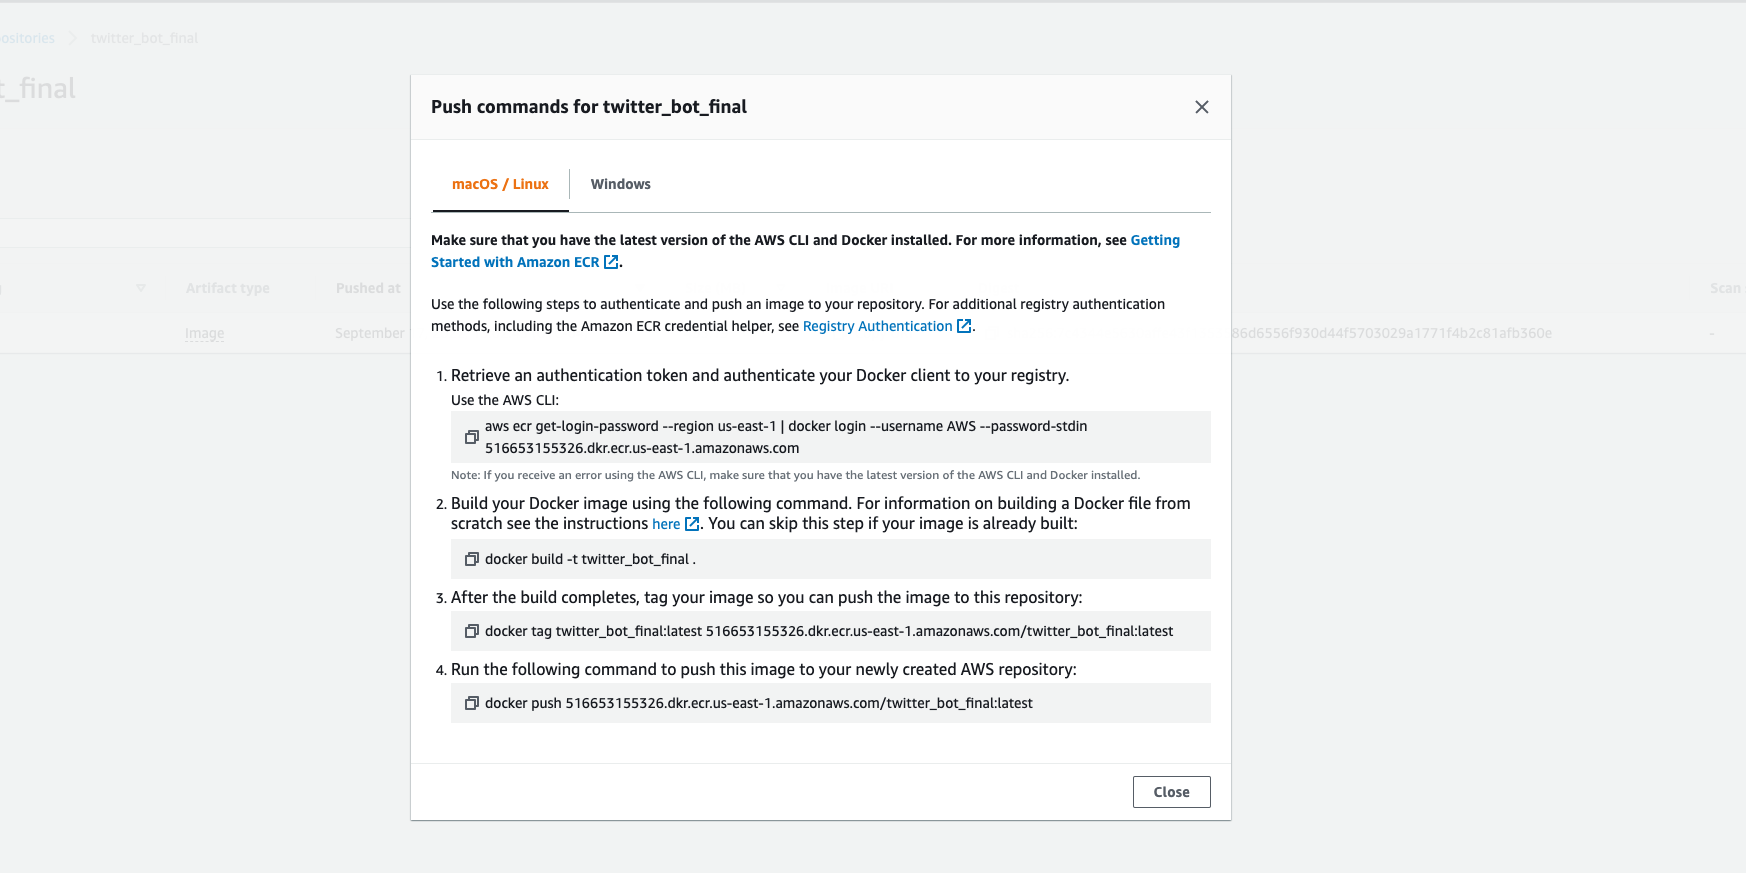
The next piece of this is getting your Docker container into ECR. To do this, you’ll first need to go to AWS ECR. Once you’re there, click on “Create Repository”. My repository is named “twitter_bot_final”. This is where you will upload your container. After you create a repository, click on “View push commands”. Here you’ll see a list of four commands you must enter into your terminal that will push your Docker container to ECR. After you enter these into the terminal, you’ll see a progress bar in your terminal that displays percentage remaining to upload to ECR. This happens rather quickly. After a few mins, hit the refresh button and you should see your Docker container there.
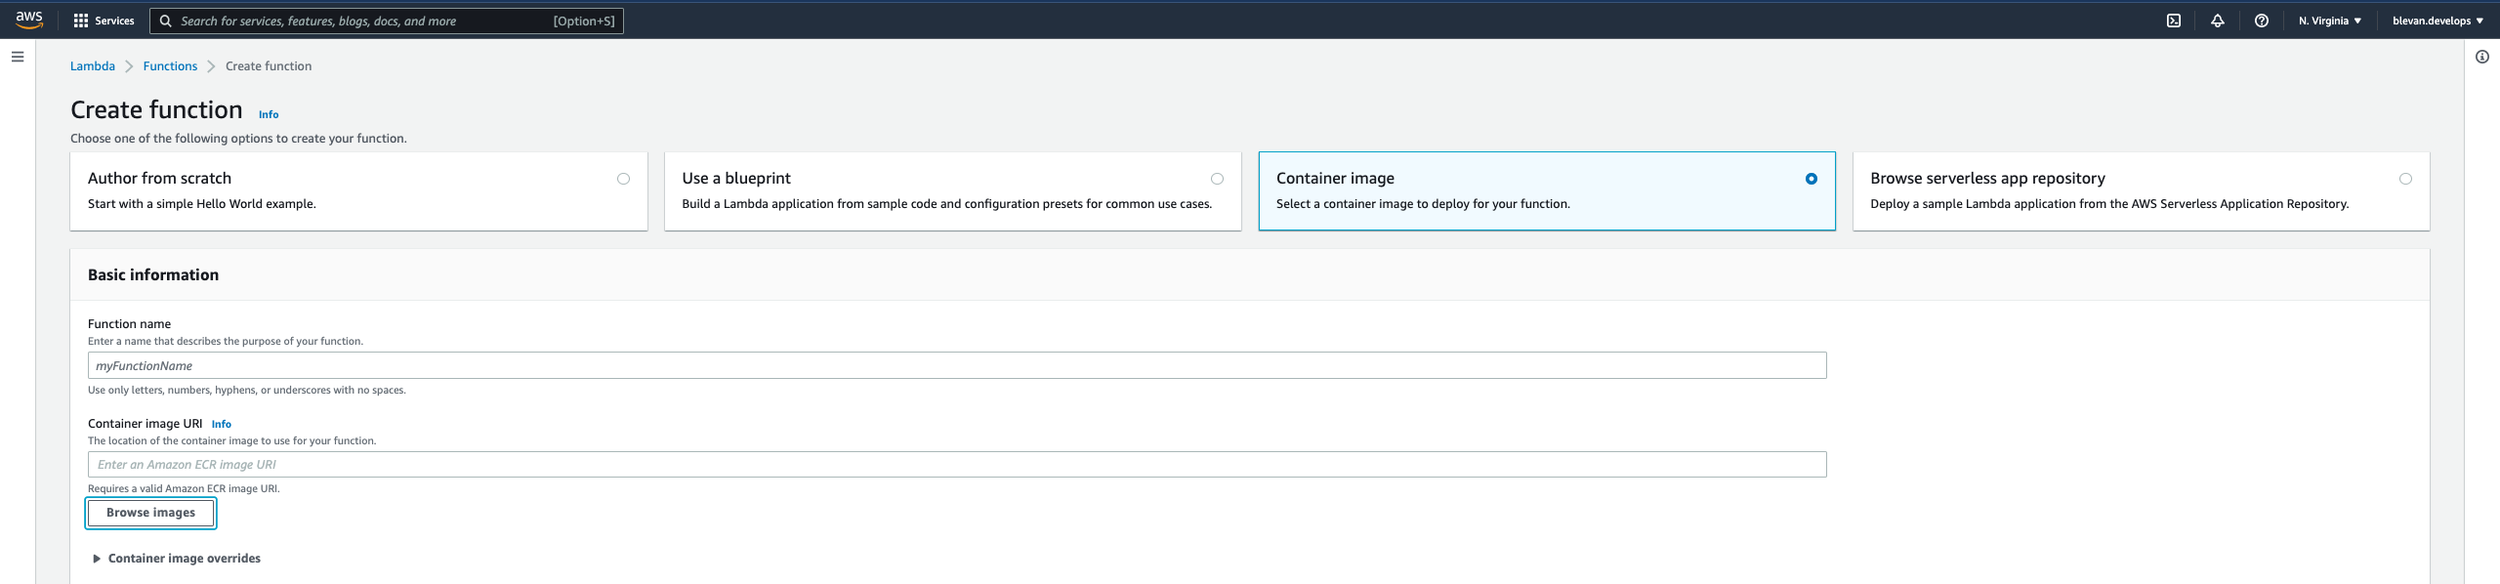
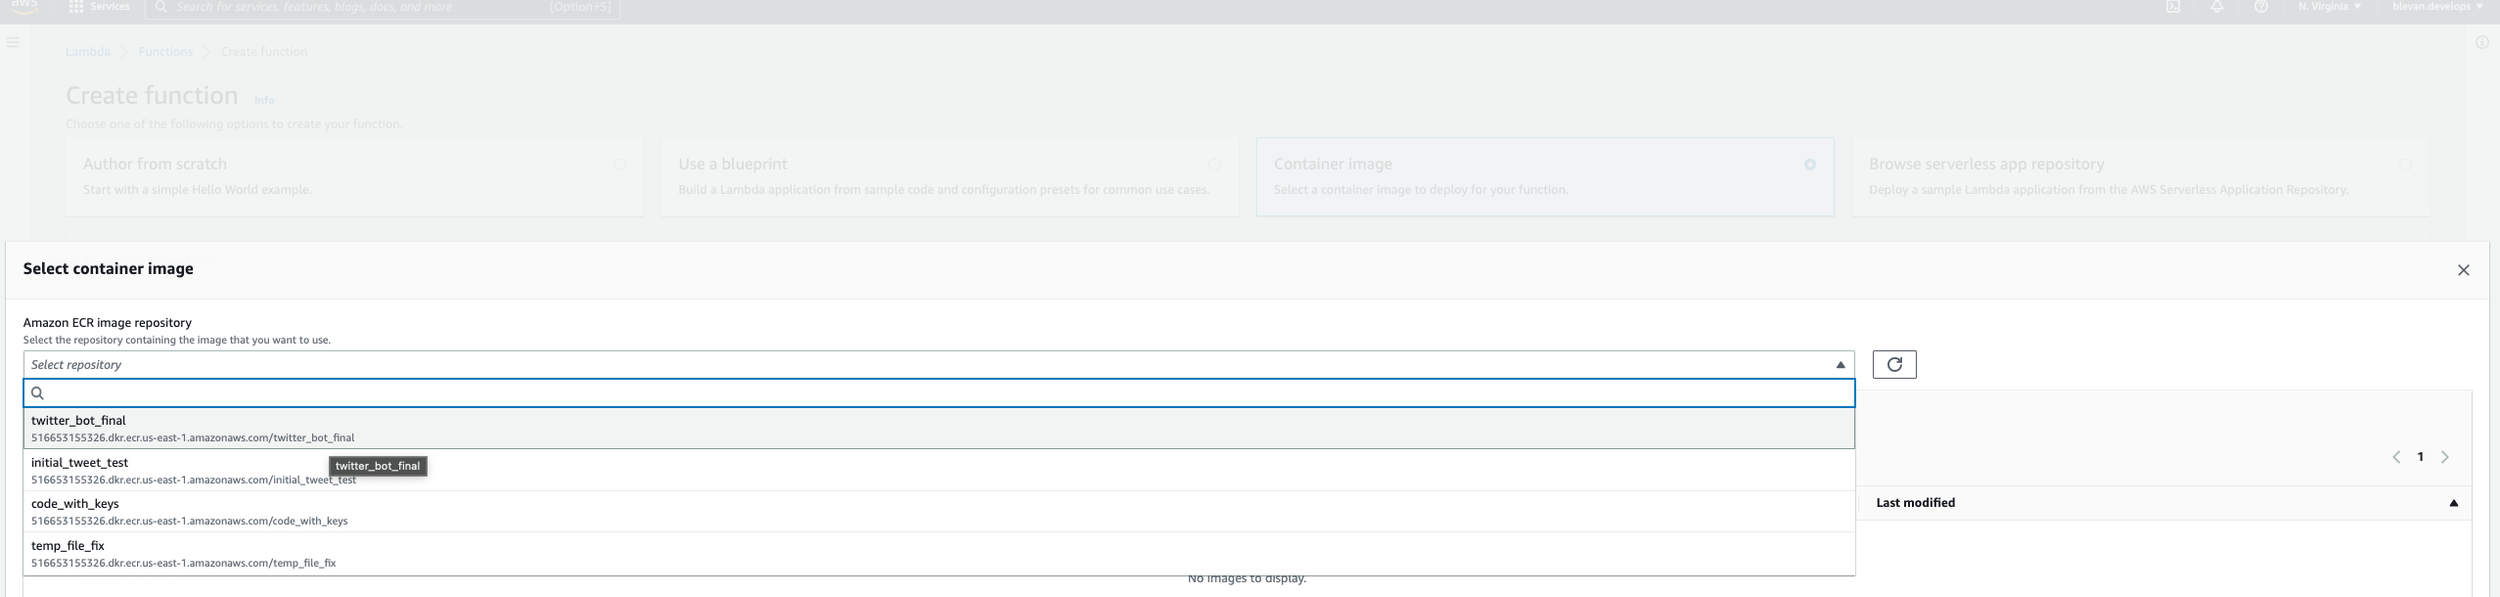
Next, search in AWS for Lambda. Once you get there, click on “Create function”. Name it however you please - I named mine twitter_bot_final (as seen in the screenshot below). Select to create your function from a container image. Then click on “Browse Images”. You should see in the drop-down the name of your ECR Image you’ve uploaded in the previous step. Add and select that image.
After this step, go back to your function and go to Configuration -> General Configuration -> Edit. Set your values to look like mine. Without setting the memory and timeouts to larger values than the default ones listed in the basic settings, the code will timeout when it is run.

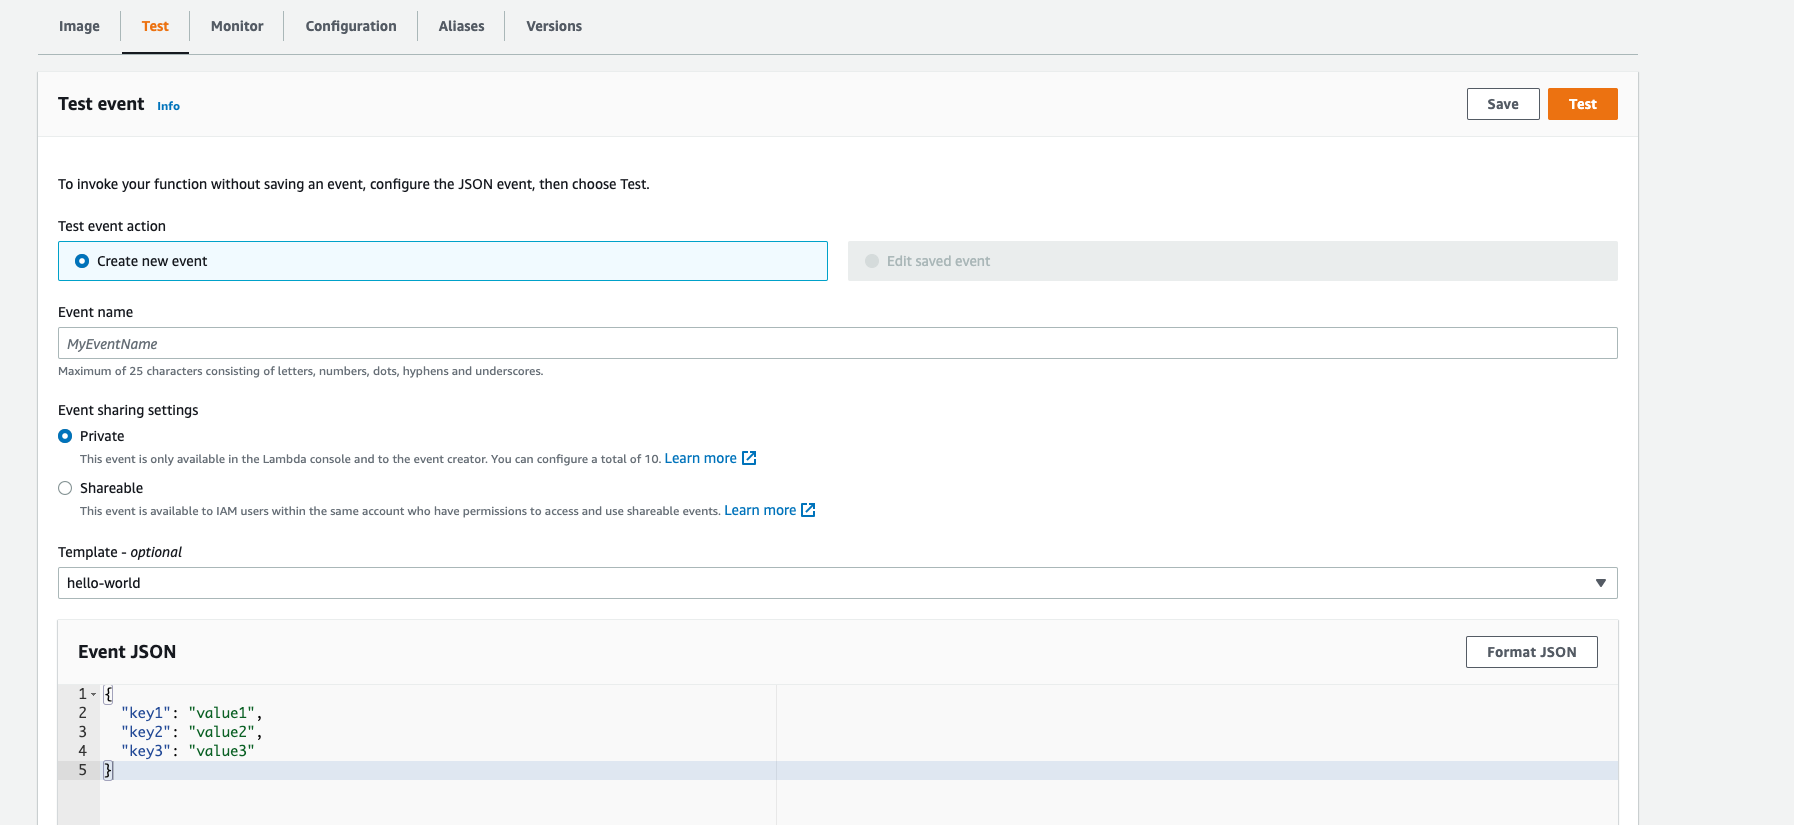
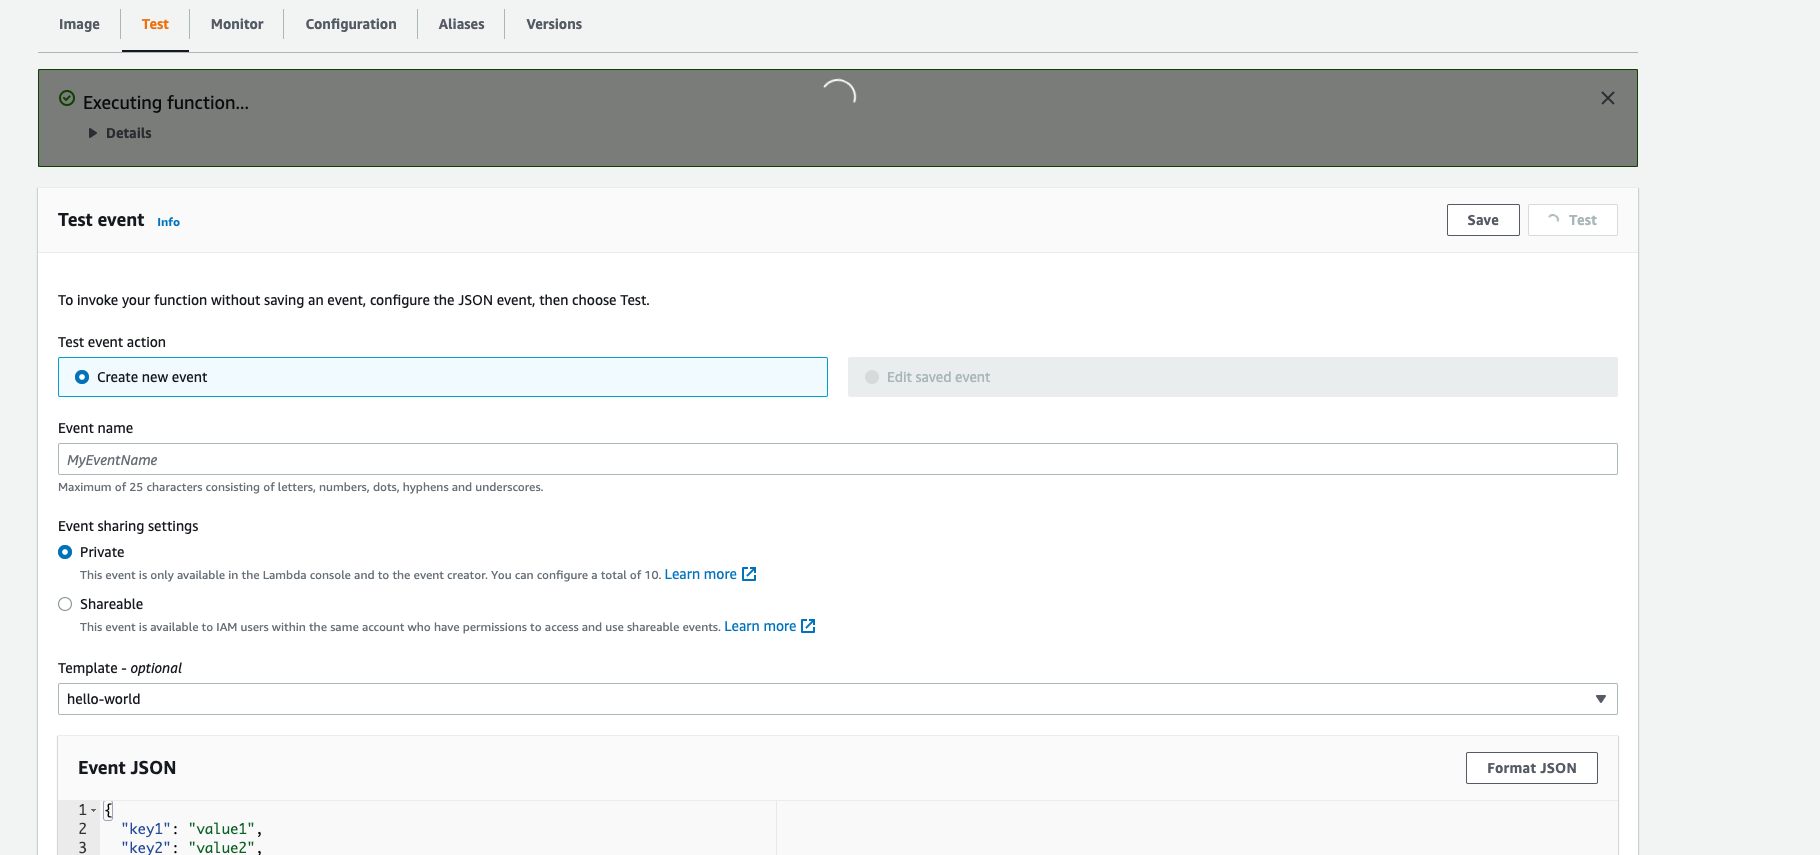
Next, go to the Test tab. What you’ll do here is use the Lambda function to test if your code stored in ECR actually works in AWS, as opposed to your desktop locally. Enter in an Event Name, which can be totally arbitrary, and the click on “Test”. What you’ll see next is a little box that pops-up that shows that your Lambda function is executing. In my case (see gallery below), my lambda function executes with an error; however, it does end up tweeting out the information I need (more about this failure later). While I would ideally want there to be no failure or error, sometimes you just have to say “if it ain’t broken, don’t fix it”. Everything works the way I expect it to, but I believe I am getting an error because a particular font-type cannot be found and there is a warning that it relates to matplotlib. I spent a ton of time getting to this point, so I am just happy that it tweets what I want it to. I can always go back and resolve these errors, but I really wanted to get this write-up done so that I can share out this project with my network and with the Apex Legends community. I eventually plan on sharing out the link to my Twitter bot with the Apex Legends subreddit, which has nearly 2.2 million followers. Feel free to give me a follow and check out how many followers this account gets overtime.
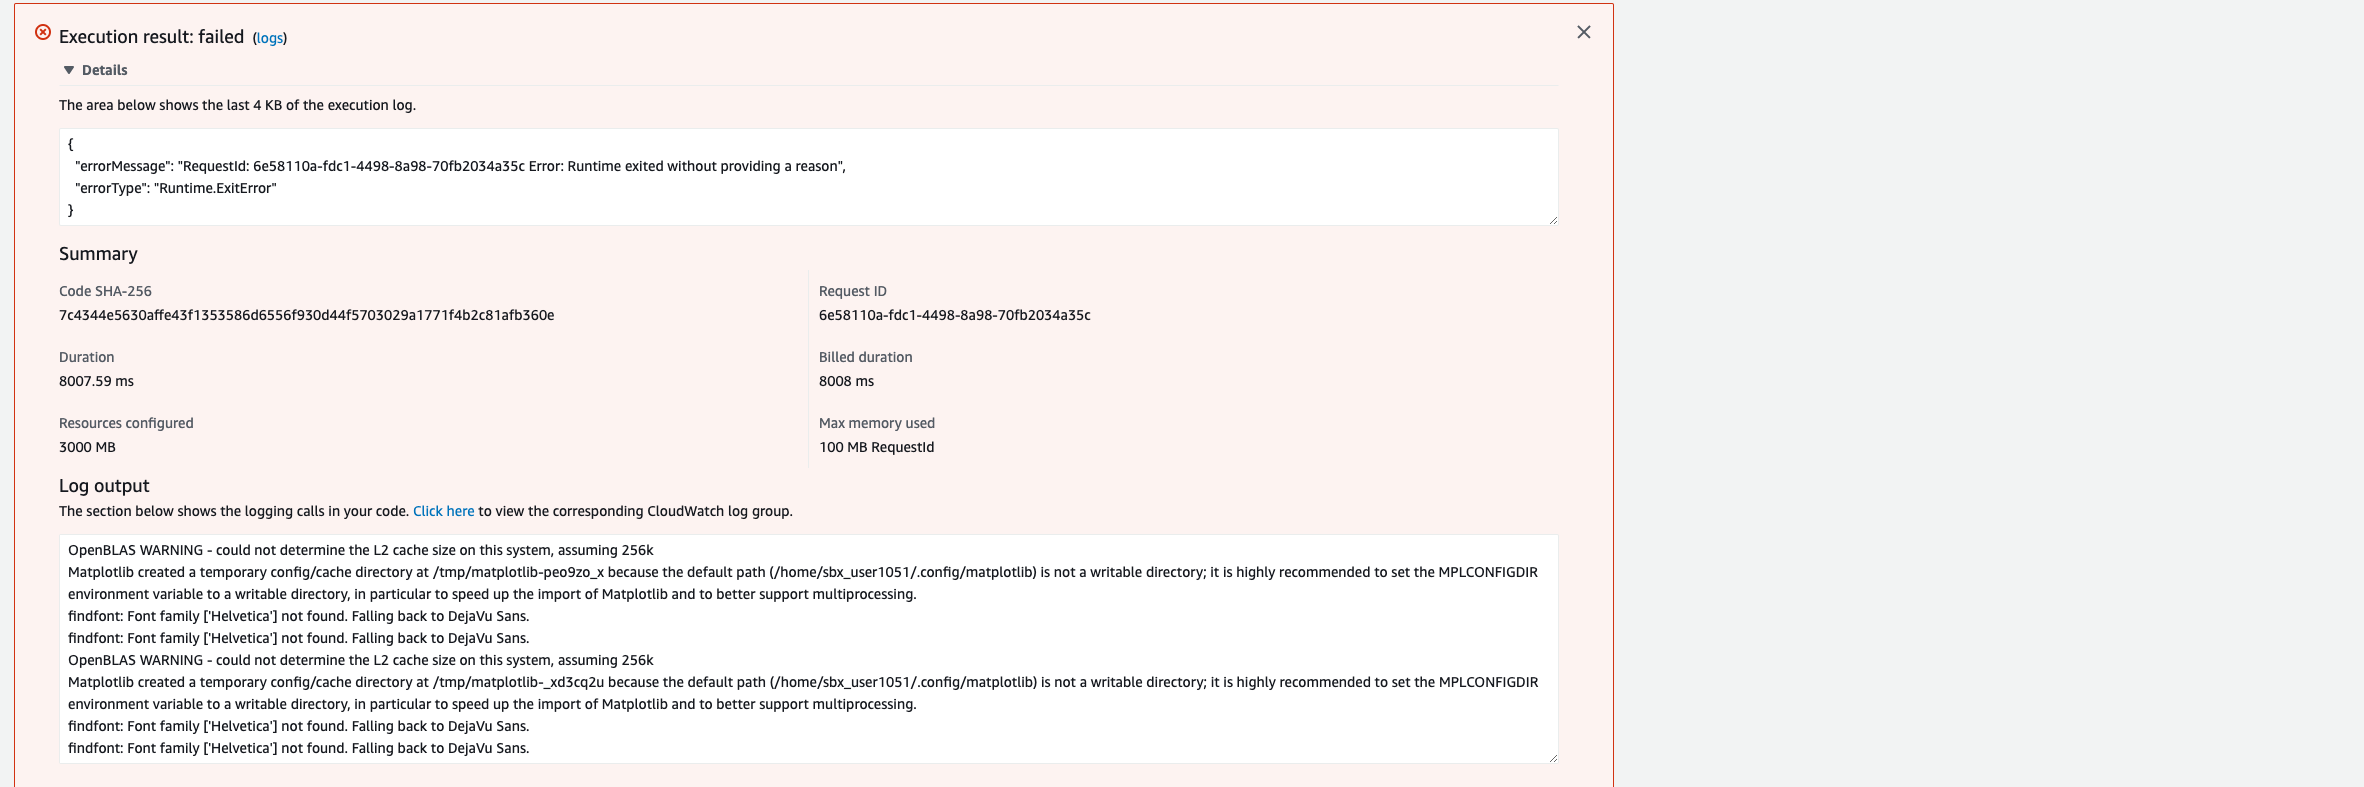
After the test executes, you can go over to your Twitter profile and check to see if the Lambda function successfully tweeted out today’s Replicator data. The screenshot below shows that my Lambda function ran successfully, even though the logs do show some error messages.

The absolute last thing that needs to be done is schedule the Lambda function to run daily. We produced the screenshot above by manually clicking on test. AWS has a job scheduler called EventBridge that will help us kickoff our Lambda function each day at a time that we set. The next section describes how this is done.
Step 5 - Scheduling Our Script to Run Daily
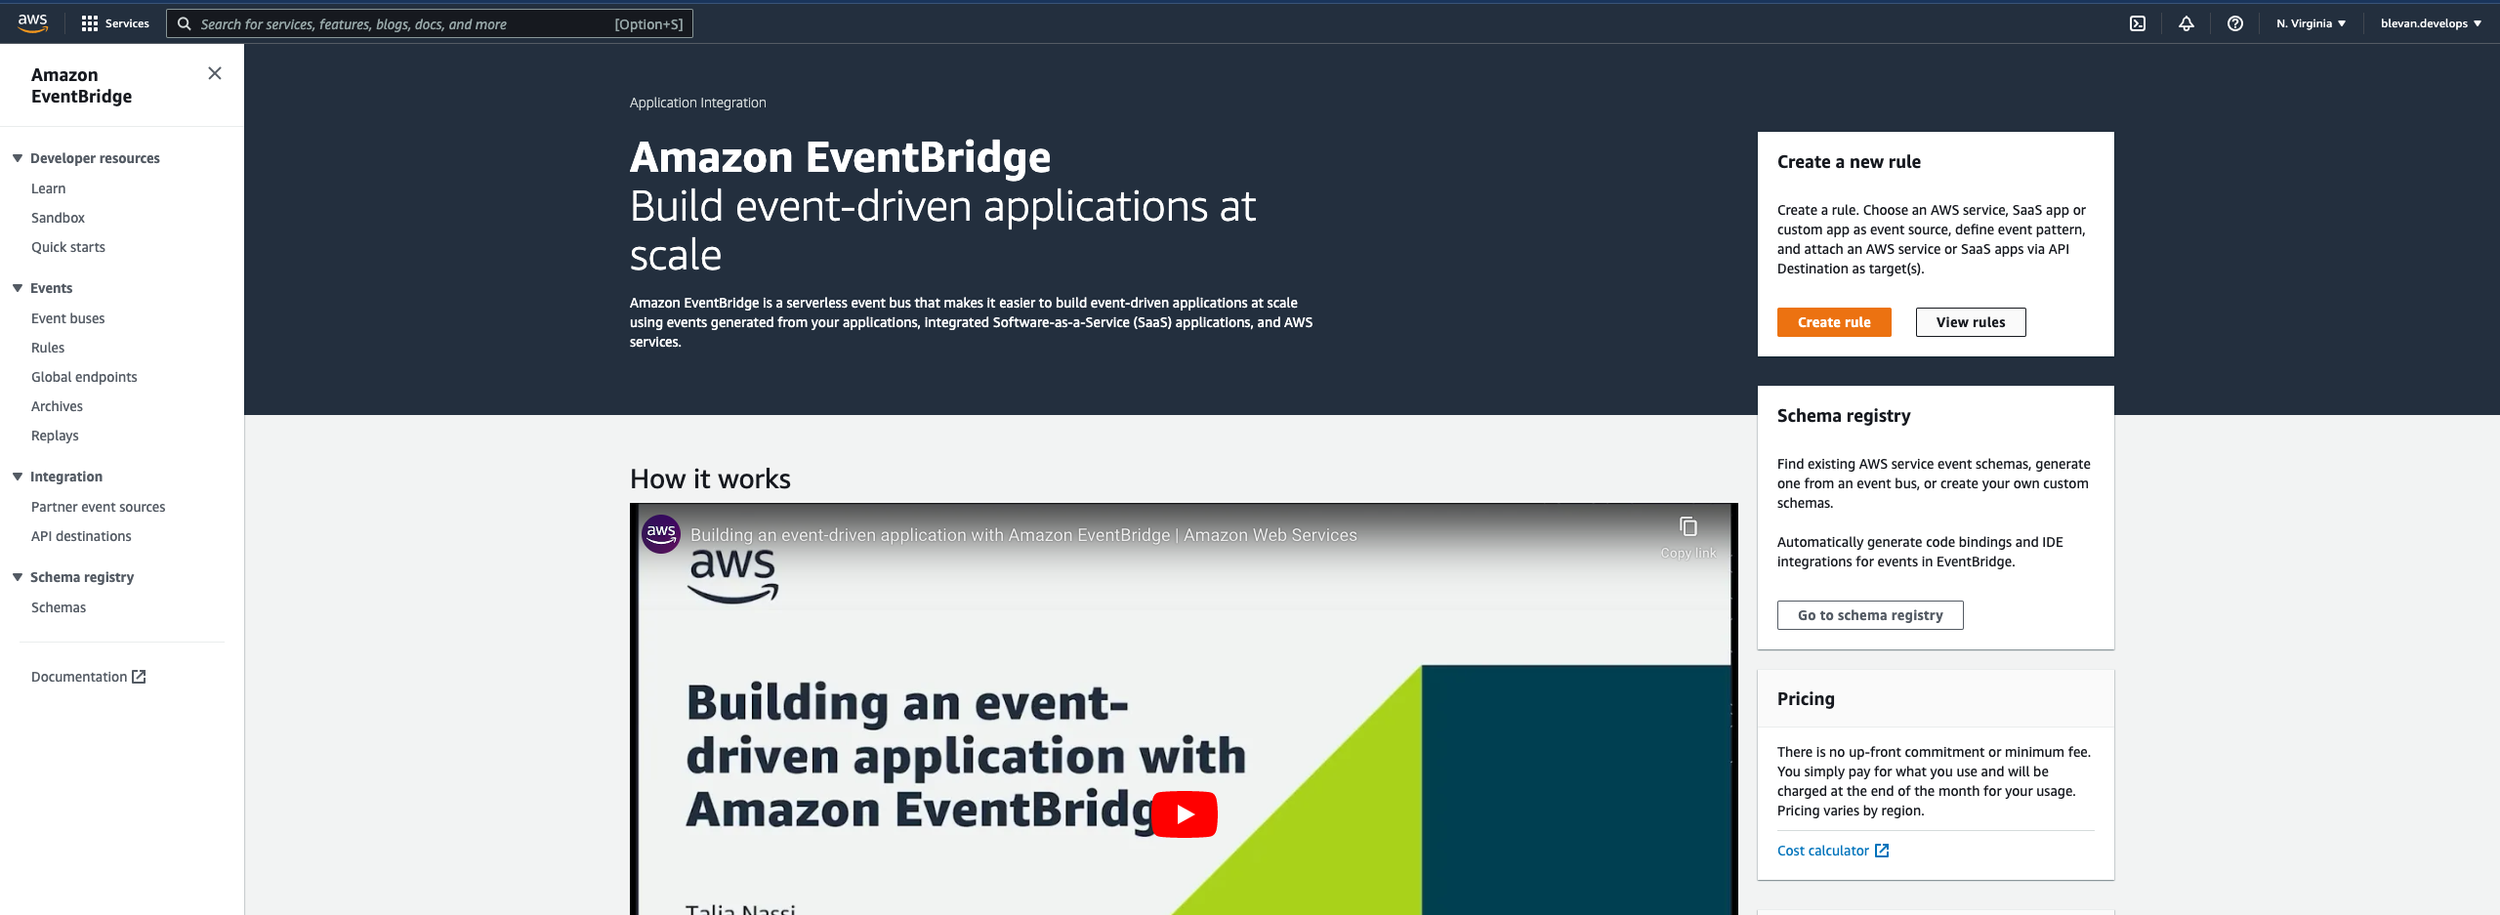
Amazon EventBridge (Formerly Amazon CloudWatch)
Amazon EventBridge is a serverless event bus that lets you receive, filter, transform, route, and deliver events. For our use case, we are going to use EventBridge as a job scheduler for our Lambda function. This means that we are going to send an event to AWS Lambda that tells the Lambda function to execute the code in ECR at a certain time of the day.
To do this, we must first search and go to EventBridge in AWS. Then take the following steps (screenshots in gallery below) -
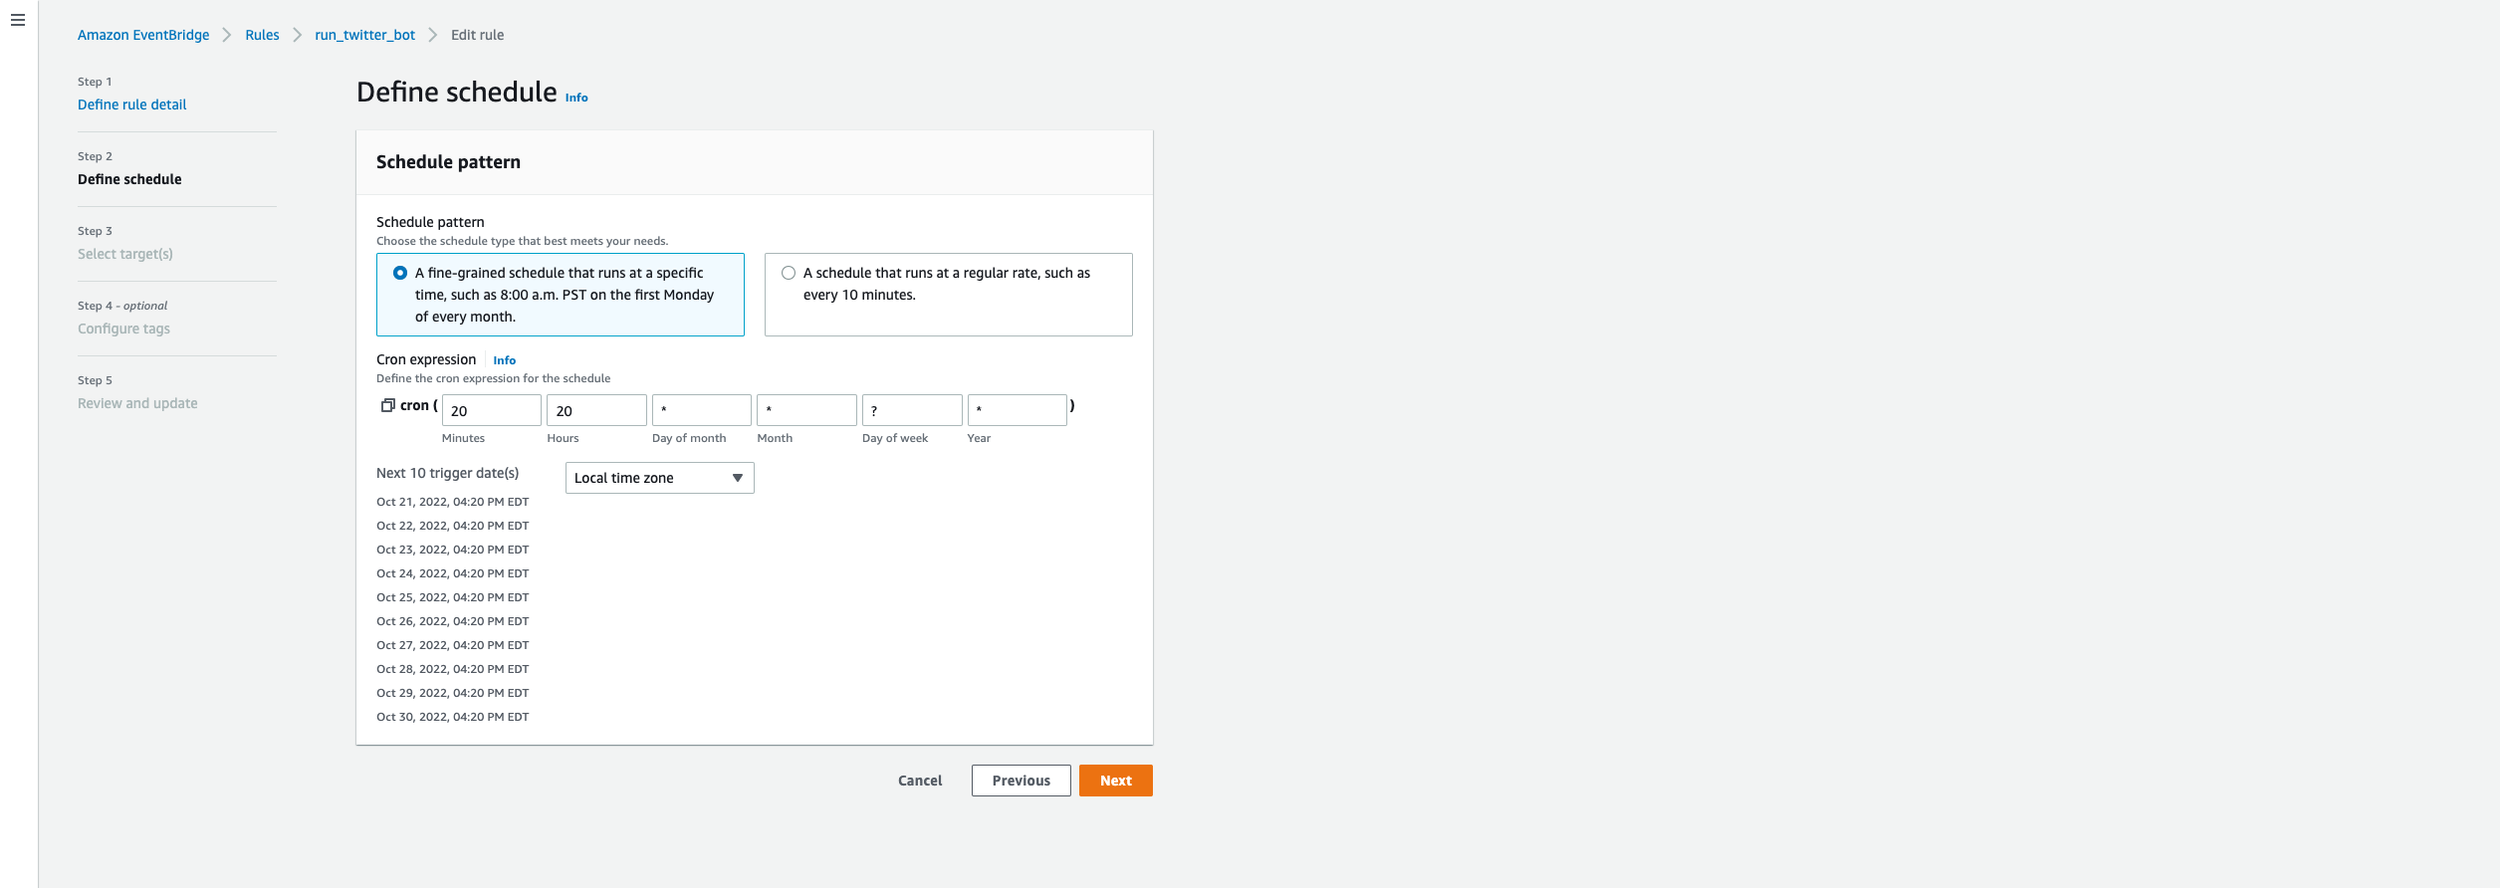
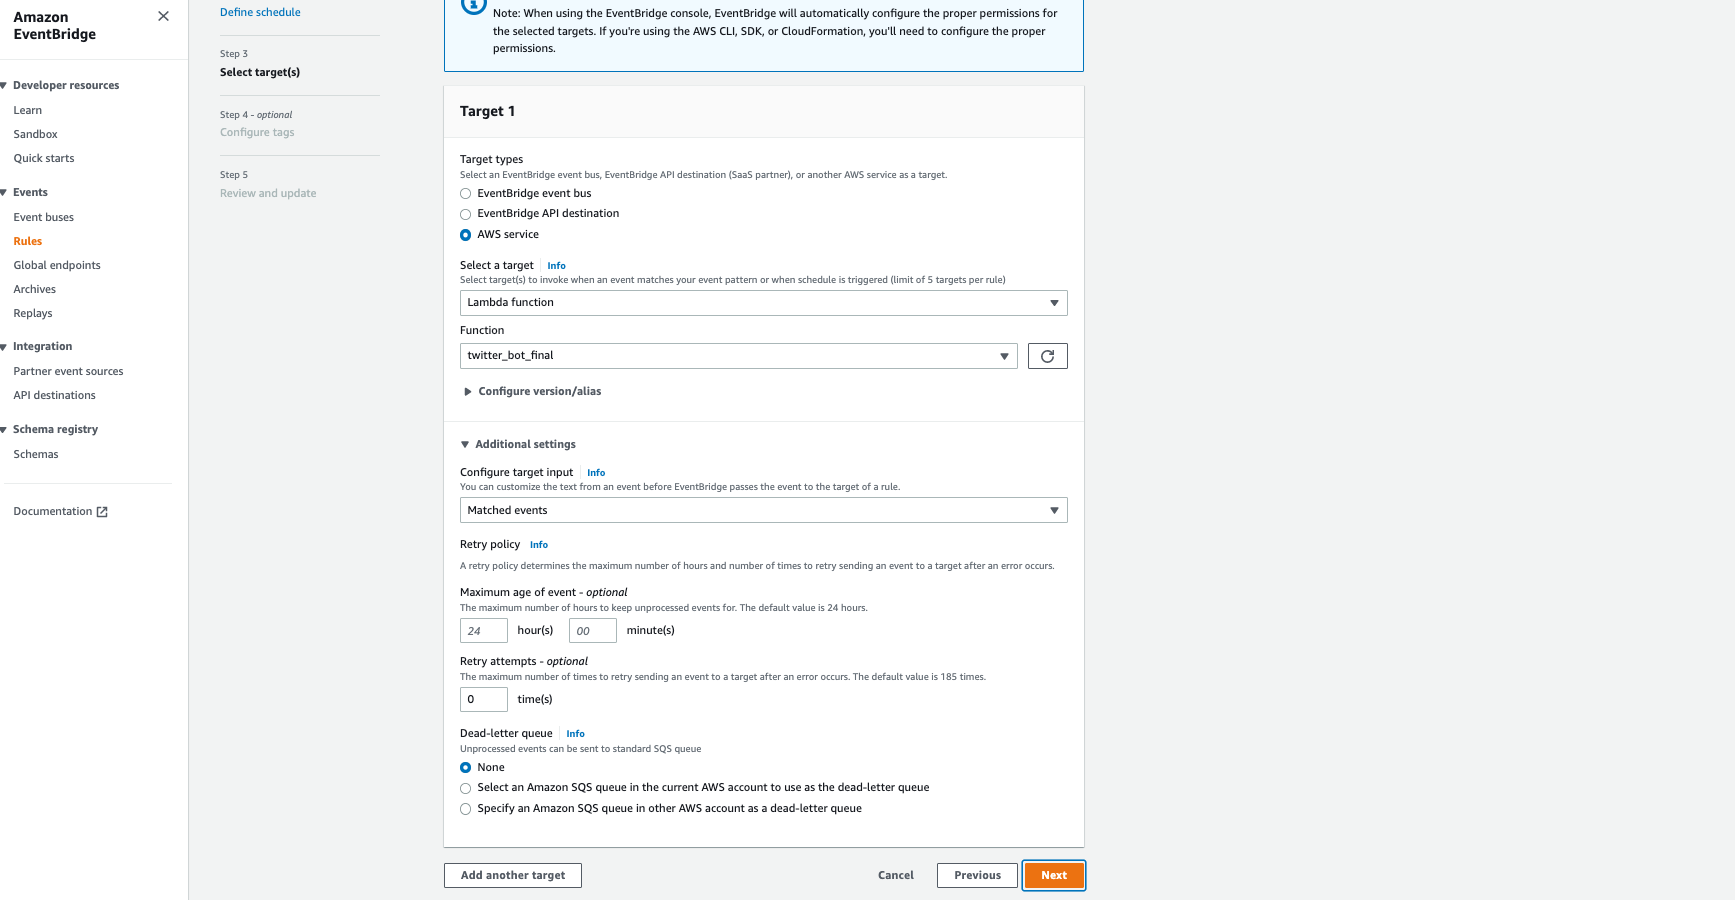
Click on “Create rule” - Give your rule a name and make sure to select the rule type of Schedule.
Define the cron expression for the schedule - Basically “How often do you want your code to run”. Mine runs everyday at 4:20 PM EST…nice. Consequently, a tweet will go out around the same time.
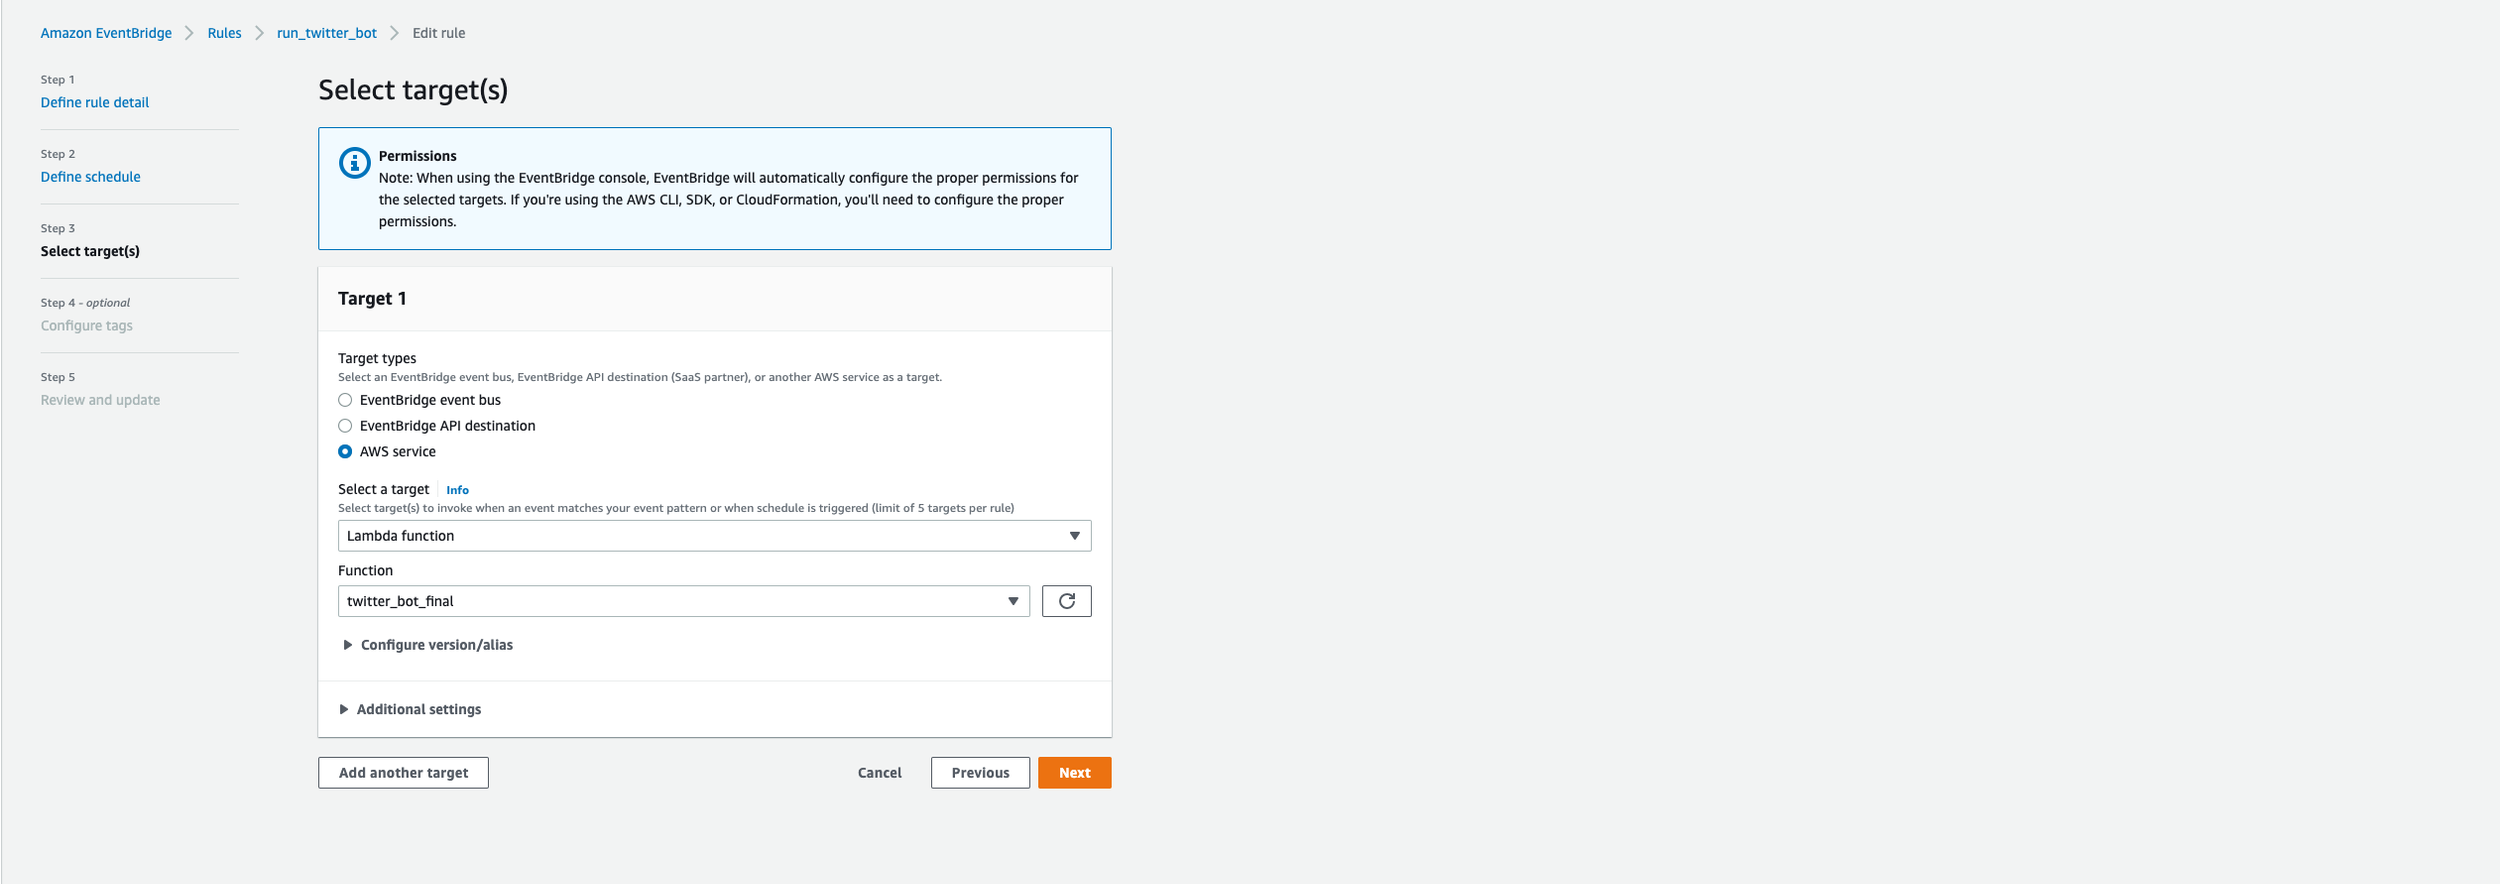
Select a target - We are going to send an event somewhere. We need to specify where we are sending that event.
Set target type to AWS Service
Select a target - Select target(s) to invoke when an event matches your event pattern or when schedule is triggered - AWS Lambda
Choose the function - Populates with a list of lambda functions you’ve created - I have twitter_bot_final selected.
After that, continue to move through the steps and create your rule. Once the rule is created, your Lambda function will kick off at whichever time you set in the job scheduler.
And with that we’ve completed the last step of the project!!!

Closing Remarks
Having never worked with Docker or AWS before, I can tell you that this was an amazing learning experience. This project took me a few months to complete and was challenging to me. There were numerous times where I was going down the wrong rabbit hole to find a solution only to realize that the solution I was looking for wasn’t the correct one. I spent the majority of the project trying to get the script to run using AWS Lambda without ECR just trying to reduce the dependencies zip-file size to be under the 250 MB limit. Ultimately, I feel like I learned a ton about AWS and how to run and schedule an application in the cloud that ACTUALLY WORKS. The solution I built does solve the problem I originally wanted to tackle - “How can I find out what is in the Apex Replicator without turning on my Playstation and playing Apex Legends”.
Perfection Isn’t Everything & Error Handling
Like I said before, this project challenged me. I was able to produce a solution that works, but it is not perfect. The outcome is Twitter bot that tweets out the same tweet twice when the Lambda function is run. It got it down from tweeting out the same tweet six times to two times, which is a success to me. While I would only want the twitter bot to tweet out once per day, I’ve exhausted a lot of time and energy on this project already, and working to get the script to only tweet once unfortunately isn’t worth my time anymore :(
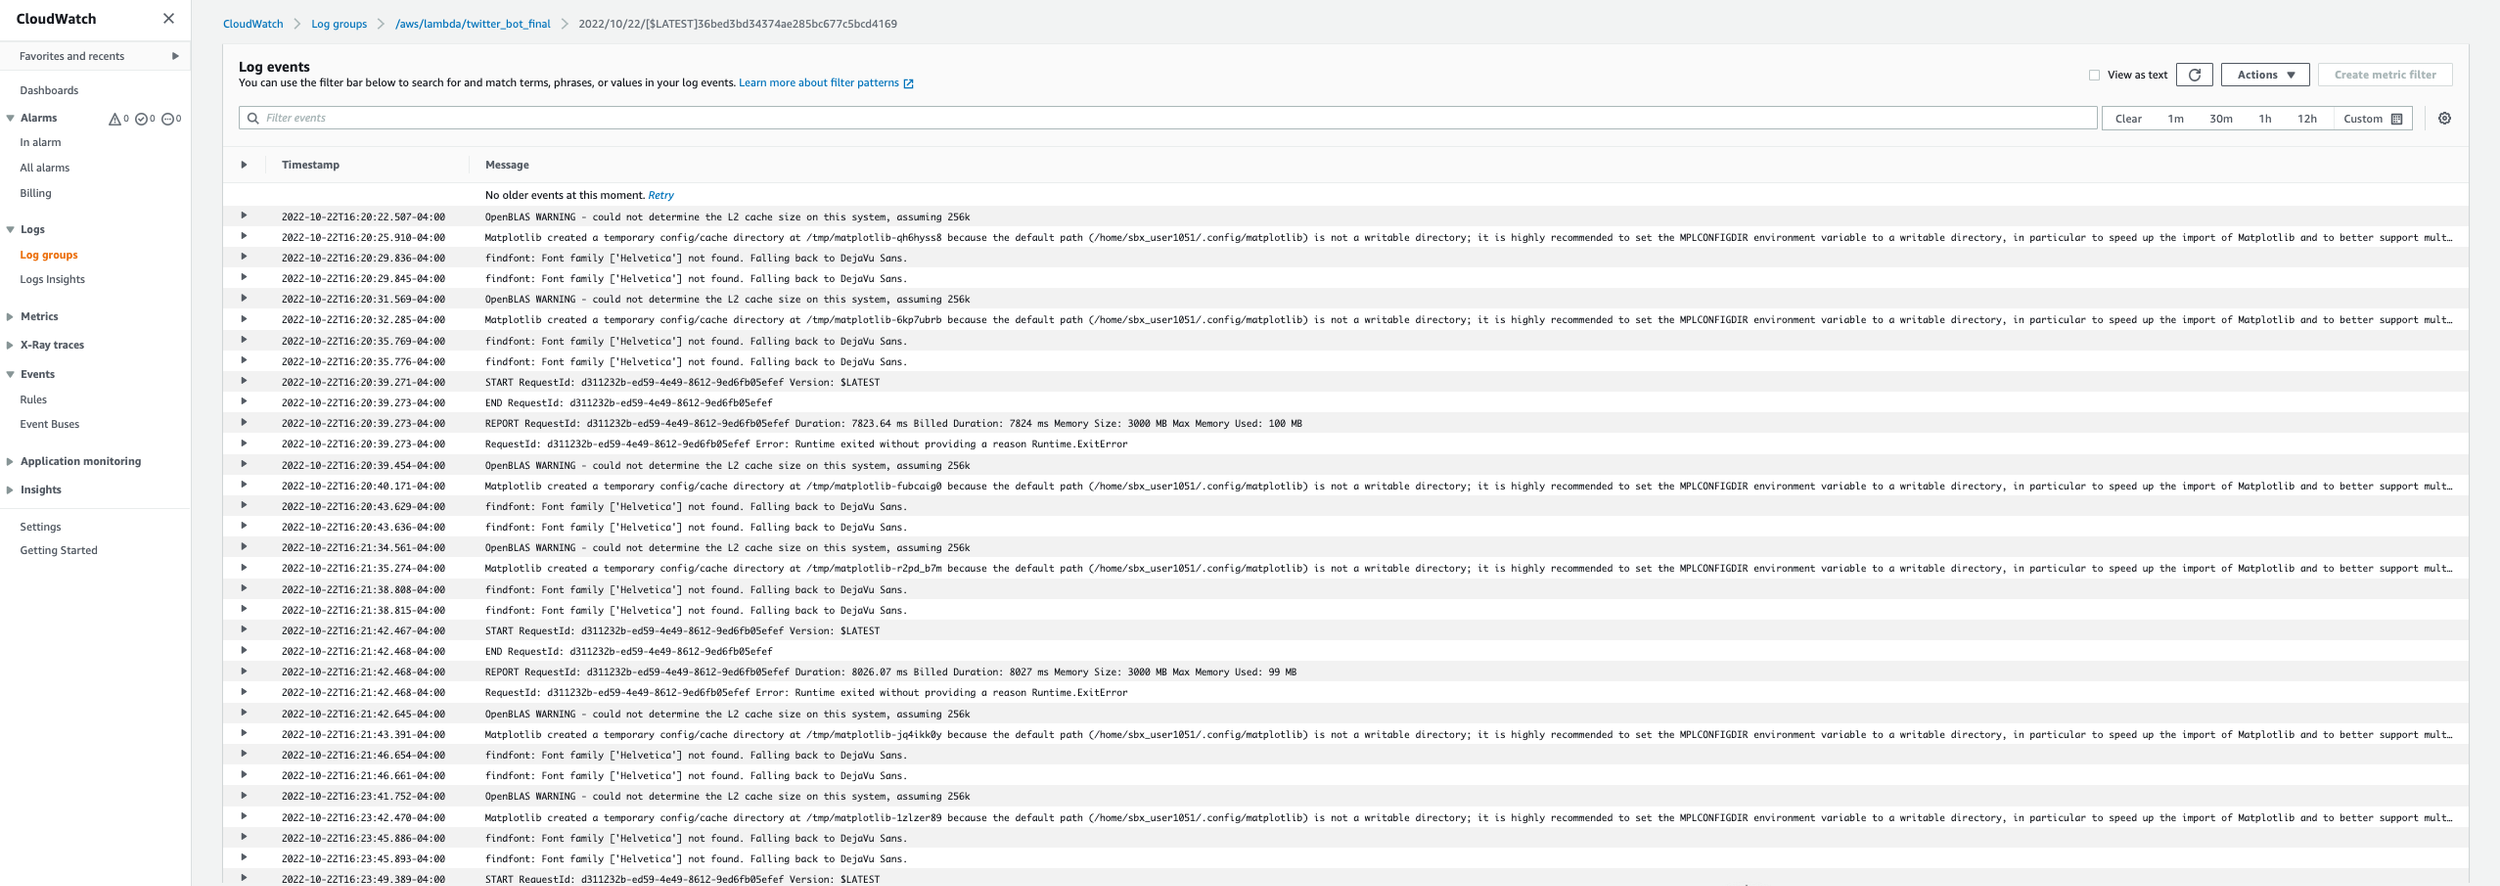
If you take a look at the CloudWatch Logs for when the Lambda function is executed, you’ll see a hand full of messages in the logs. These are the error messages that need still need troubleshooting and error handling, but I am happy to say that I understand WHY my application initially tweet out six times when the Lambda function was run.
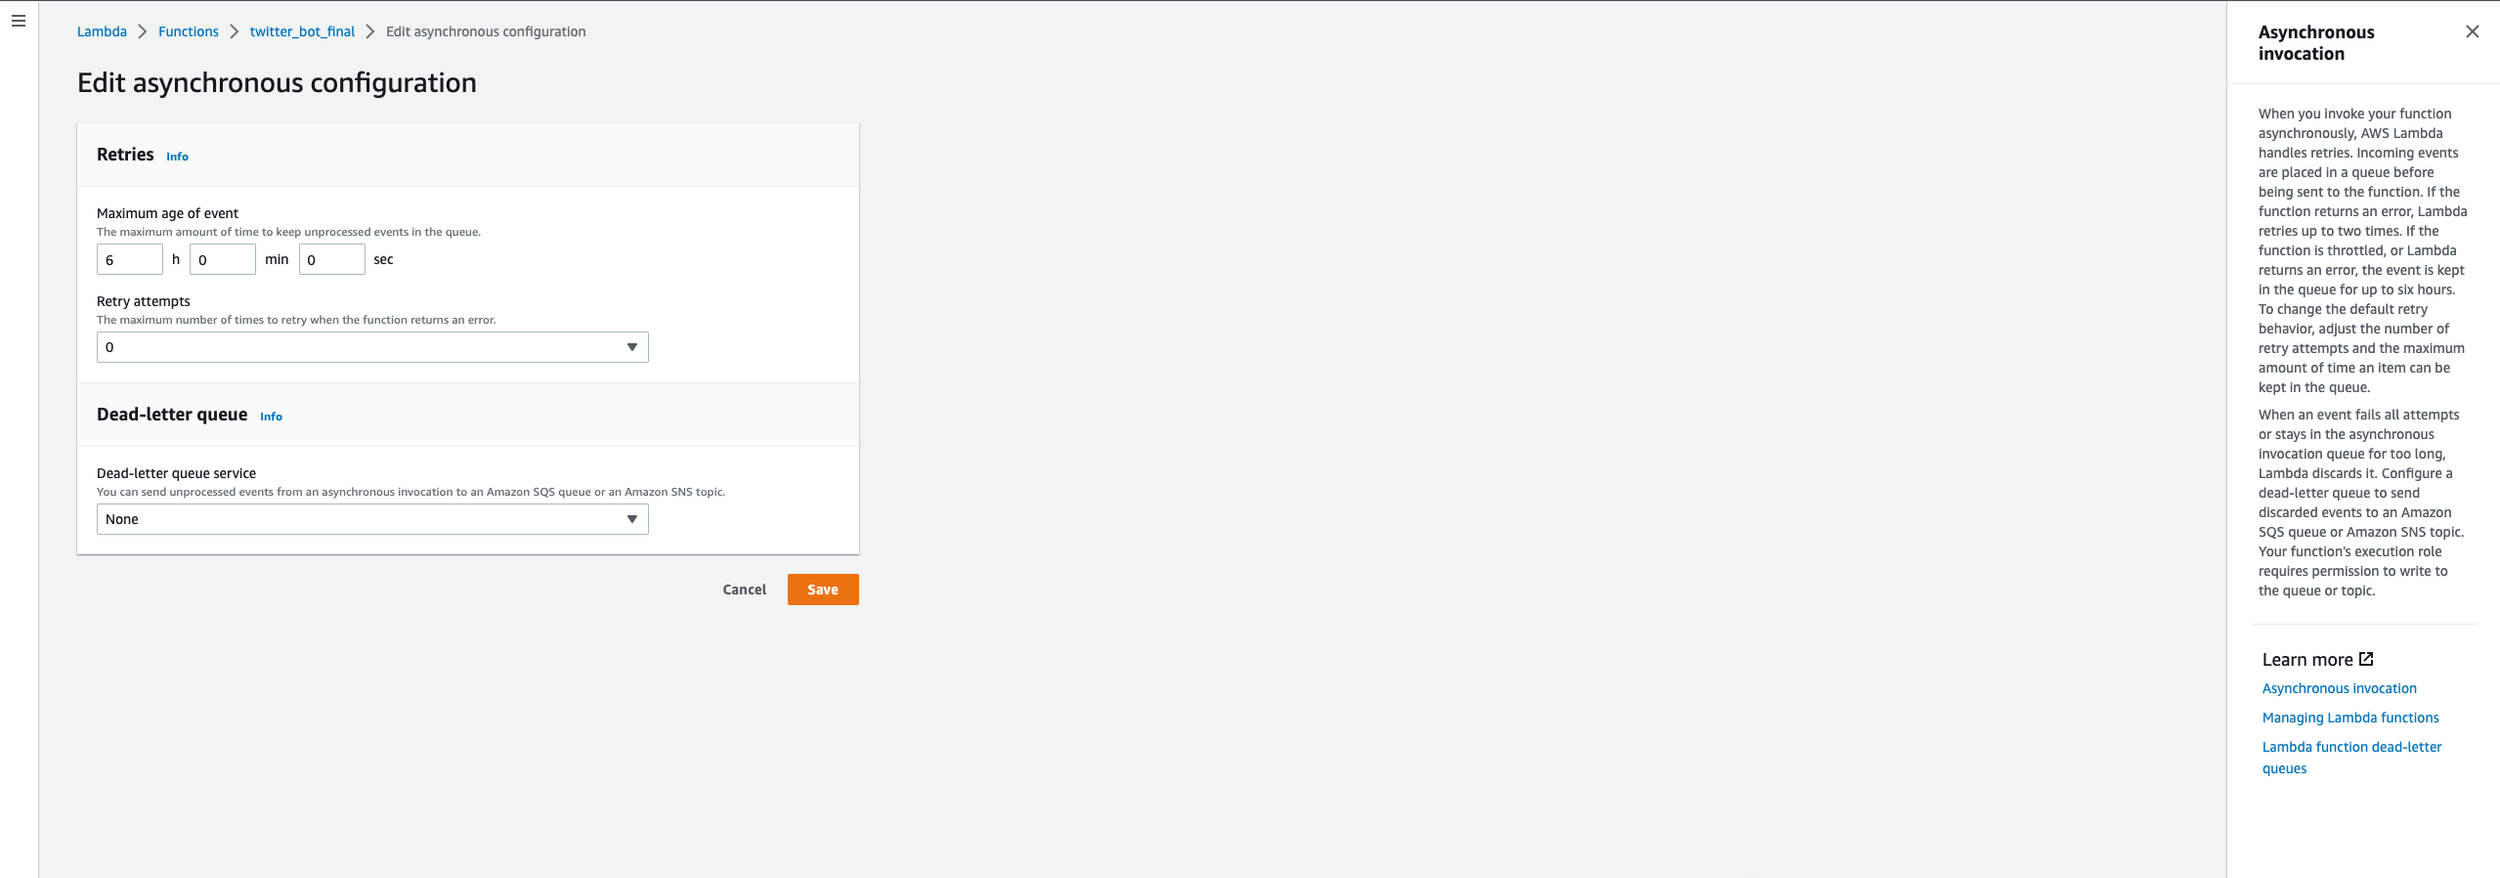
What was happening was that, for some reason, the script executes each function we created, but the functions are run twice. This creates two tweets per run. Why is it tweeting out six times? WELL, turns out that in AWS Lambda, there is something called auto-retry. When the function returns a failure message, AWS Lambda’s error handler says “let’s try and re-run this function three more times to see if we can avoid a failure”.
In AWS Lambda, if you go to the Configuration tab, then Asynchronous invocation, and click edit (see second picture in carousel below), you’ll see where you can set the number of retry attempts. One other thing I tried was changing the retry attempts in Event Bridge (see last screenshot in carousel). Event Bridge defines this as the maximum number of times to retry sending an event to a target after an error occurs. The default value is 185 times.
I really hope you enjoyed this post and ultimately learned something new, since I certainly did during this project. If you’d like to view the whole script or download it, you can do so here. If you have any questions about what I wrote here, or just want to leave some feedback about this post, feel free to do so in the comment section below. If you’ve read some of my previous posts, you’ll know that I am learning Python, and through blogging, I’m improving my skills with these personal projects and exercises that are in my areas of interest. If you’d like to work on a project together or want to recommend ways to improve this script, please do not hesitate to reach out. Thanks for reading.
-
These were some helpful resources I used to help learn about the technologies I used in this post. While not all are relevant now, I kept track of the ones I found most helpful, so relaying those to you all.
-
These were some helpful resources I used to help learn about the technologies I used in this post. While not all are relevant now, I kept track of the ones I found most helpful, so relaying those to you all.
General “How to Build a Tweepy Bot Using AWS Lamba”
• https://dev.to/jeannienguyen/building-a-twitter-bot-with-python-and-aws-lambda-27jg
• https://jacobysuh.com/blog/2019/twitter-bot-aws-lambda/
• https://dylancastillo.co/how-to-make-a-twitter-bot-for-free/
• https://www.youtube.com/watch?v=Wm-9TYdb9HA
• https://aws.plainenglish.io/create-your-own-python-layer-on-aws-lambda-environment-2e5160b66f17
• https://medium.com/brlink/how-to-create-a-python-layer-in-aws-lambda-287235215b79
• https://aws.plainenglish.io/creating-aws-lambda-layer-for-python-runtime-1d1bc6c5148d
• https://frankcorso.dev/aws-lambda-python-twitter-bot.html
Zipping and Terminal Commands
• https://stackoverflow.com/questions/57688731/unable-to-import-module-lambda-function-no-module-named-pandas
Why Can’t I Install Pandas and Numpy to AWS
• https://blog.kukiel.dev/posts/pandas-and-numpy-lambda-layer.html
• https://medium.com/@shimo164/lambda-layer-to-use-numpy-and-pandas-in-aws-lambda-function-8a0e040faa18
• https://github.com/numpy/numpy/issues/13465
• Layer Folder Structure and Naming Handler
• https://stackoverflow.com/questions/35340921/aws-error-from-python-no-module-named-lambda-function
Pip Install to a Specific Directory
• https://stackoverflow.com/questions/17216689/pip-install-python-package-into-a-specific-directory-other-than-the-default-inst
Post Photo to Twitter
• https://www.mattcrampton.com/blog/step_by_step_tutorial_to_post_to_twitter_using_python_part_two-posting_with_photos/
• https://www.geeksforgeeks.org/python-media-object-in-tweepy/
• https://stackoverflow.com/questions/70745572/how-to-upload-in-memory-image-with-tweepy
Move File To and From S3
• https://medium.com/bilesanmiahmad/how-to-upload-a-file-to-amazon-s3-in-python-68757a1867c6
• https://stackoverflow.com/questions/69833454/using-lambda-to-get-image-from-s3-returns-a-white-box-in-python
• https://stackoverflow.com/questions/14346065/upload-image-available-at-public-url-to-s3-using-boto
• https://erangad.medium.com/upload-a-remote-image-to-s3-without-saving-it-first-with-python-def9c6ee1140
• https://stackoverflow.com/questions/45268003/upload-thumbnail-image-to-s3-using-boto3
• https://discuss.dizzycoding.com/save-dataframe-to-csv-directly-to-s3-python/
• https://stackoverflow.com/questions/61437609/cant-read-png-files-from-s3-in-python-3
To Memory
• https://stackoverflow.com/questions/60897224/how-to-download-an-image-from-s3-and-store-it-as-a-variable-instead-of-storing-i
• https://stackoverflow.com/questions/44043036/how-to-read-image-file-from-s3-bucket-directly-into-memory
Convert DF to Image
• https://stackoverflow.com/questions/35634238/how-to-save-a-pandas-dataframe-table-as-a-png
Save as Bytes
• https://stackoverflow.com/questions/72718194/how-to-save-a-pandas-dataframe-table-as-a-tempory-png-file-or-bytes-without-savi
• https://discuss.dizzycoding.com/how-to-write-png-image-to-string-with-the-pil/
• https://stackoverflow.com/questions/36274868/saving-an-image-to-bytes-and-uploading-to-boto3-returning-content-md5-mismatch
Twitter Developer Portal
• https://developer.twitter.com/en/portal/products/elevated
Requirements.txt in Jupyter
• https://towardsdatascience.com/generating-a-requirements-file-jupyter-notebook-385f1c315b52
Docker
• https://www.geeksforgeeks.org/how-to-run-a-python-script-using-docker/
• https://medium.com/geekculture/how-to-dockerize-a-python-script-b0af3cd11fb0
• https://medium.com/codex/push-docker-image-to-aws-ecr-e9718df8a729
• https://www.freecodecamp.org/news/build-and-push-docker-images-to-aws-ecr/
• https://docs.docker.com/develop/develop-images/dockerfile_best-practices/
Secrets Manager
• https://hands-on.cloud/working-with-secrets-manager-in-python-using-boto3/